The mass e-mailing module is important for several reasons. One might think that mass mailing is only for sending annoying emails to as many people as possible, but honestly it is not. You can use this module to inform your customers about important information from your world. For example, if you offer a service, you can inform your customers about the availability or unavailability of the given service within certain time periods. Alternatively, if you are, for example, transport or forwarding company, then you can approach exactly those customers who have given you work from location XY with the fact that you will have a free vehicle there.
Of course, there are many cases for which mass mailing is used, so I believe that each of you will find something for yourself here 😇
Creating an email template
A video is worth a thousand words. It's probably not exactly said that way, but I believe that from this short video you will understand how easily you can create your first campaign in Mango.
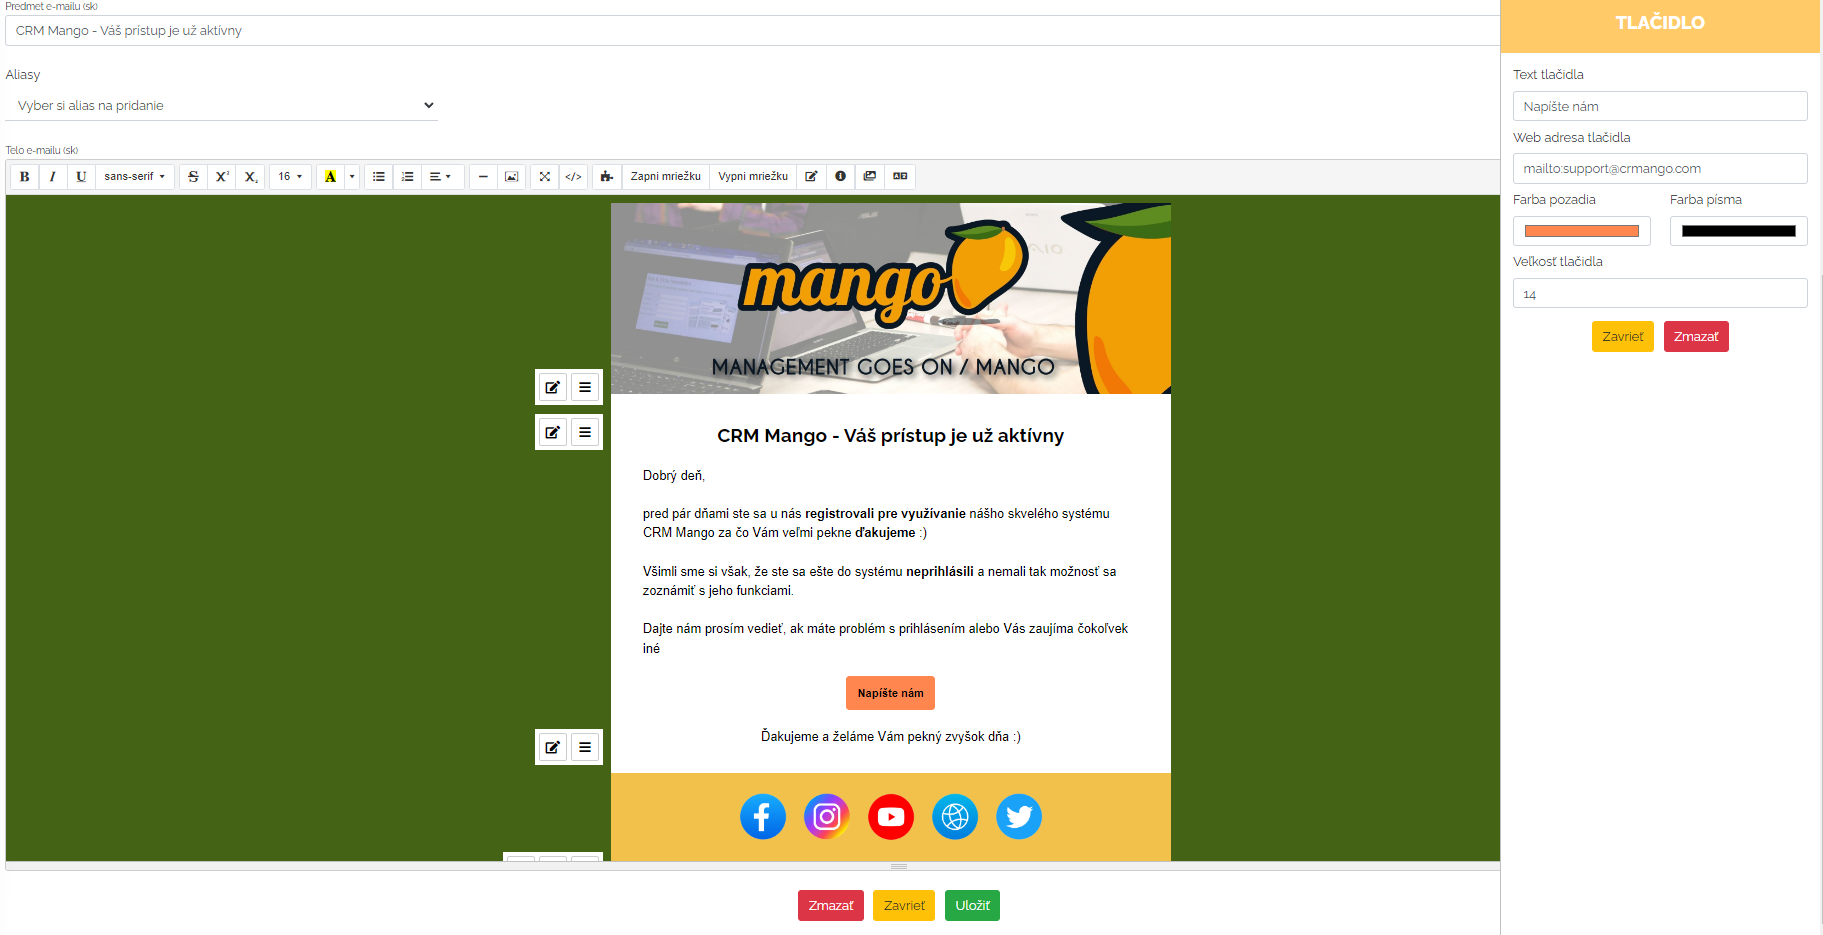
Here is also a short preview of a ready-made, simple campaign related to Mango.
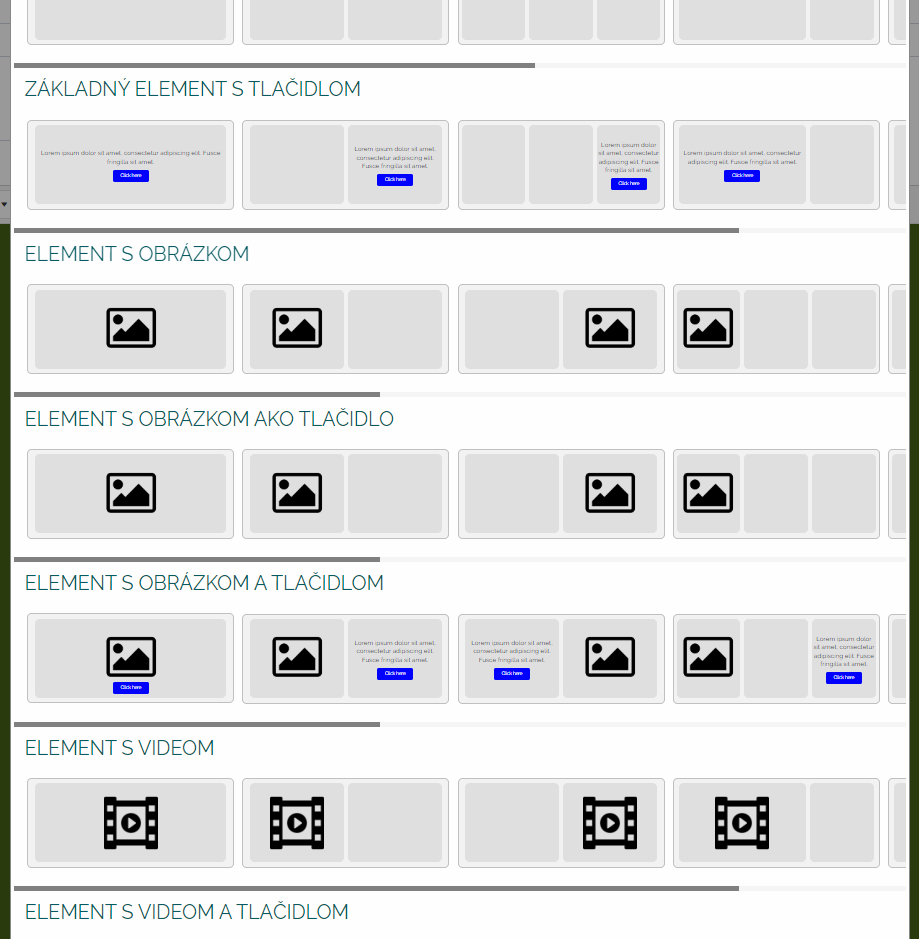
In particular, the campaign above is simply assembled from ready-made elements that we offer at Mango.
There are really enough individual elements in Mango, and we are constantly expanding them as needed.
Among the special functions of Mango when creating an e-mail campaign, the following functions are certainly included:
- button Please contact me. This special button in the given email template serves to immediately collect leads from customers who click on it. After the customer clicks on the button, a lead will be generated directly in your Mango and a notification will be sent to the user of the given company.
-automatic text translator in email templates. This function ensures that it will be enough for you to create a template in one language and Mango will translate the given template into other current languages as needed. You can then send e-mails according to your customer's language.
- special html elements for API. These elements are used to identify the place where you insert your code or email sections when creating a campaign via our REST API.
Sending the campaign to customers
Once we have a finished email campaign, sending the campaign is no more complicated than creating it.
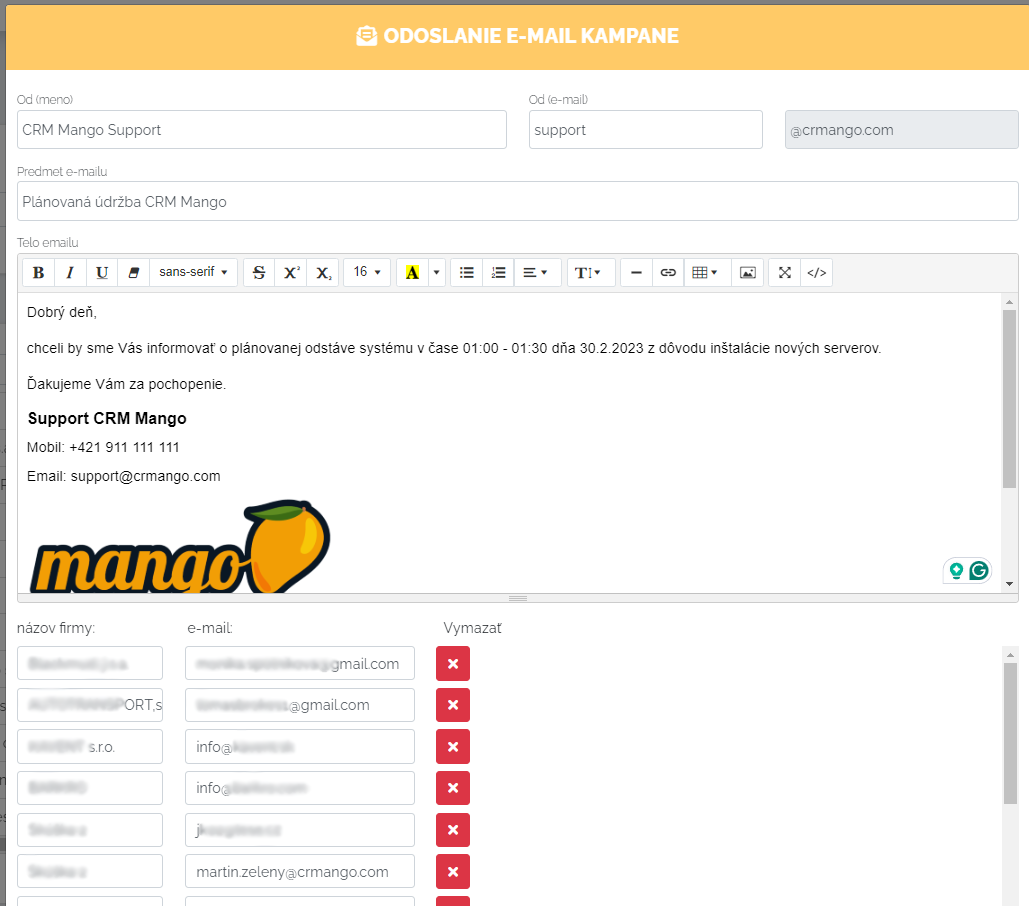
In the list of clients, you simply filter those to whom you would like to send a given email, mark them and click on Send mass email.
Subsequently, a simple window will pop up that will offer you all the e-mail addresses from the given companies that have given you permission to send such e-mails. Within each email address, you can see whether this campaign has already been sent to them, if so, when was the last time, or whether any other campaign has not been sent to this customer. From this data, you can then easily decide whether or not to send this new campaign to this address.
If you need to send a bulk e-mail to the given companies, but you don't want to create an e-mail template, and you just want to send a simple e-mail, you can do it in the same way, i.e. choose a company and choose the option of sending a one-time e-mail. At this point, you just write what you need, check the recipients and start sending.
Reporting of e-mail campaigns
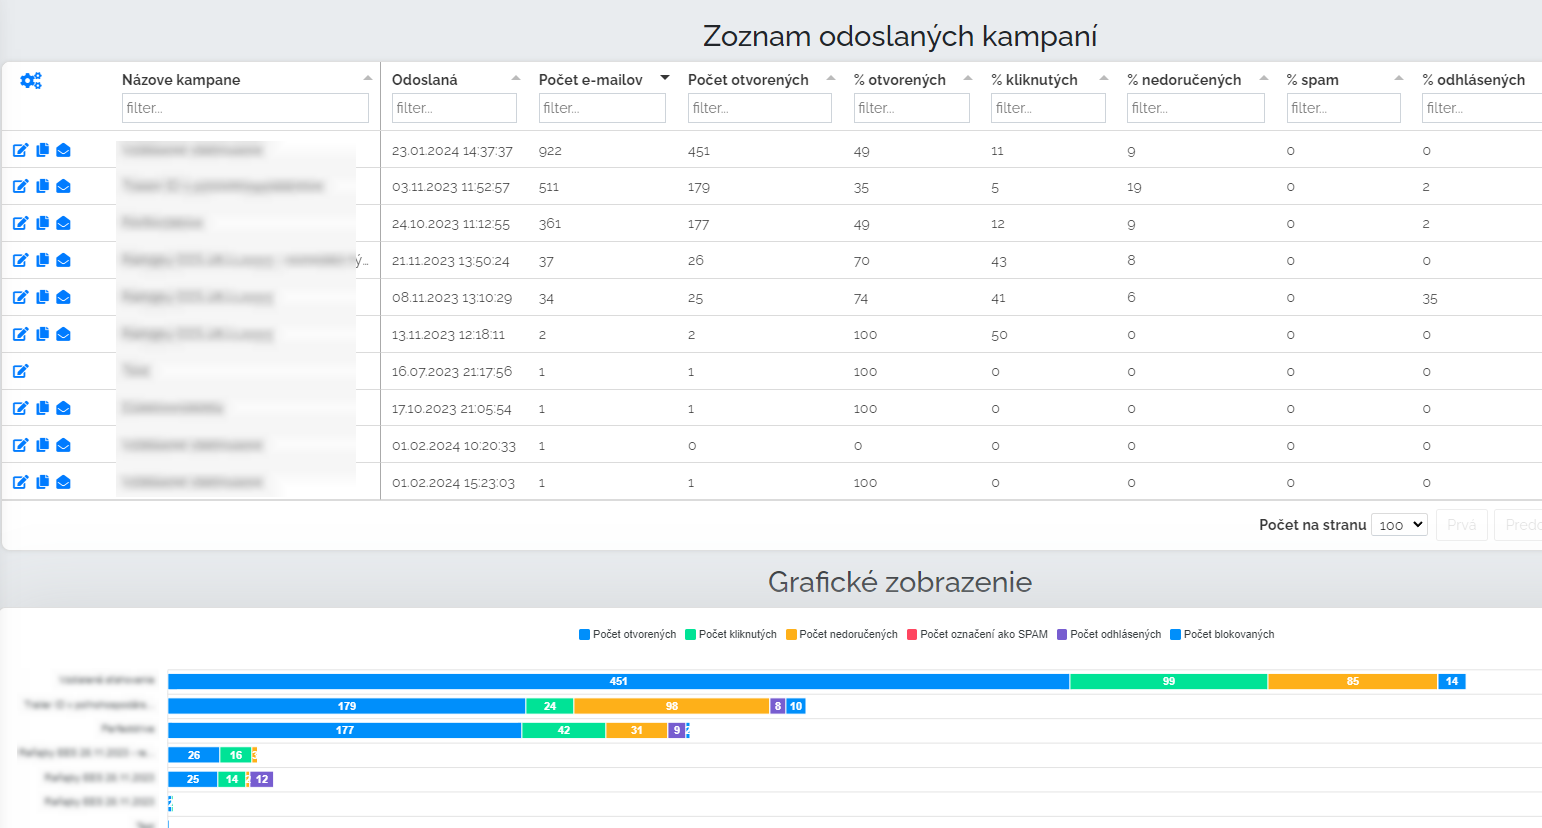
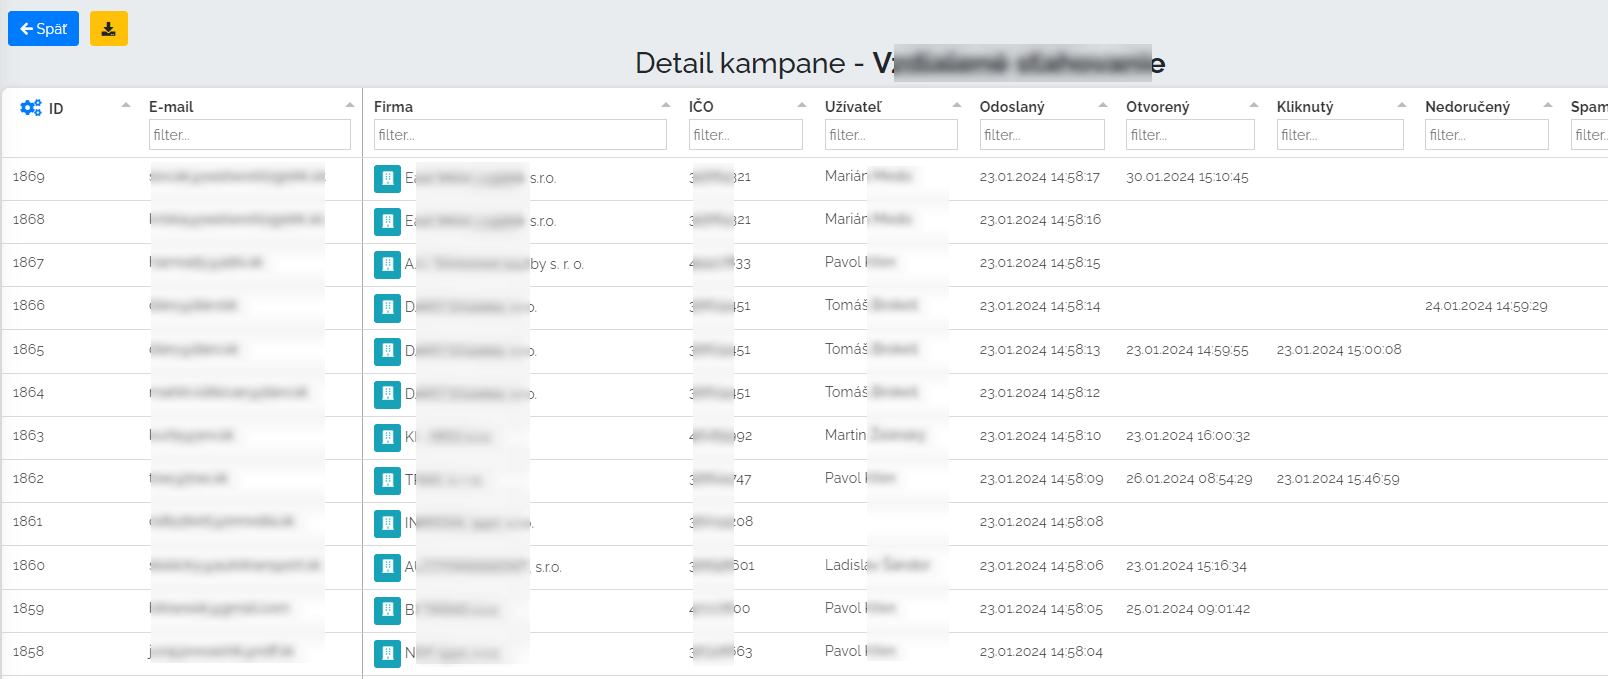
In order to know whether your campaign was successful or not, or to be able to subsequently contact a certain group of customers, you need a quality report. And of course Mango will provide you with this😊
Basically, you have a simple list of all campaigns that you have sent, including information on what percentage of customers opened the given e-mail, or clicked on a link in the given e-mail, or perhaps how many customers unsubscribed from your e-mails. Of course, Mango also checks the deliverability of e-mails and notifies you of those where it fails to send and deliver your e-mail.
