Clicking on the Settings section will open the main settings menu, where we will then select the CRM Settings option:
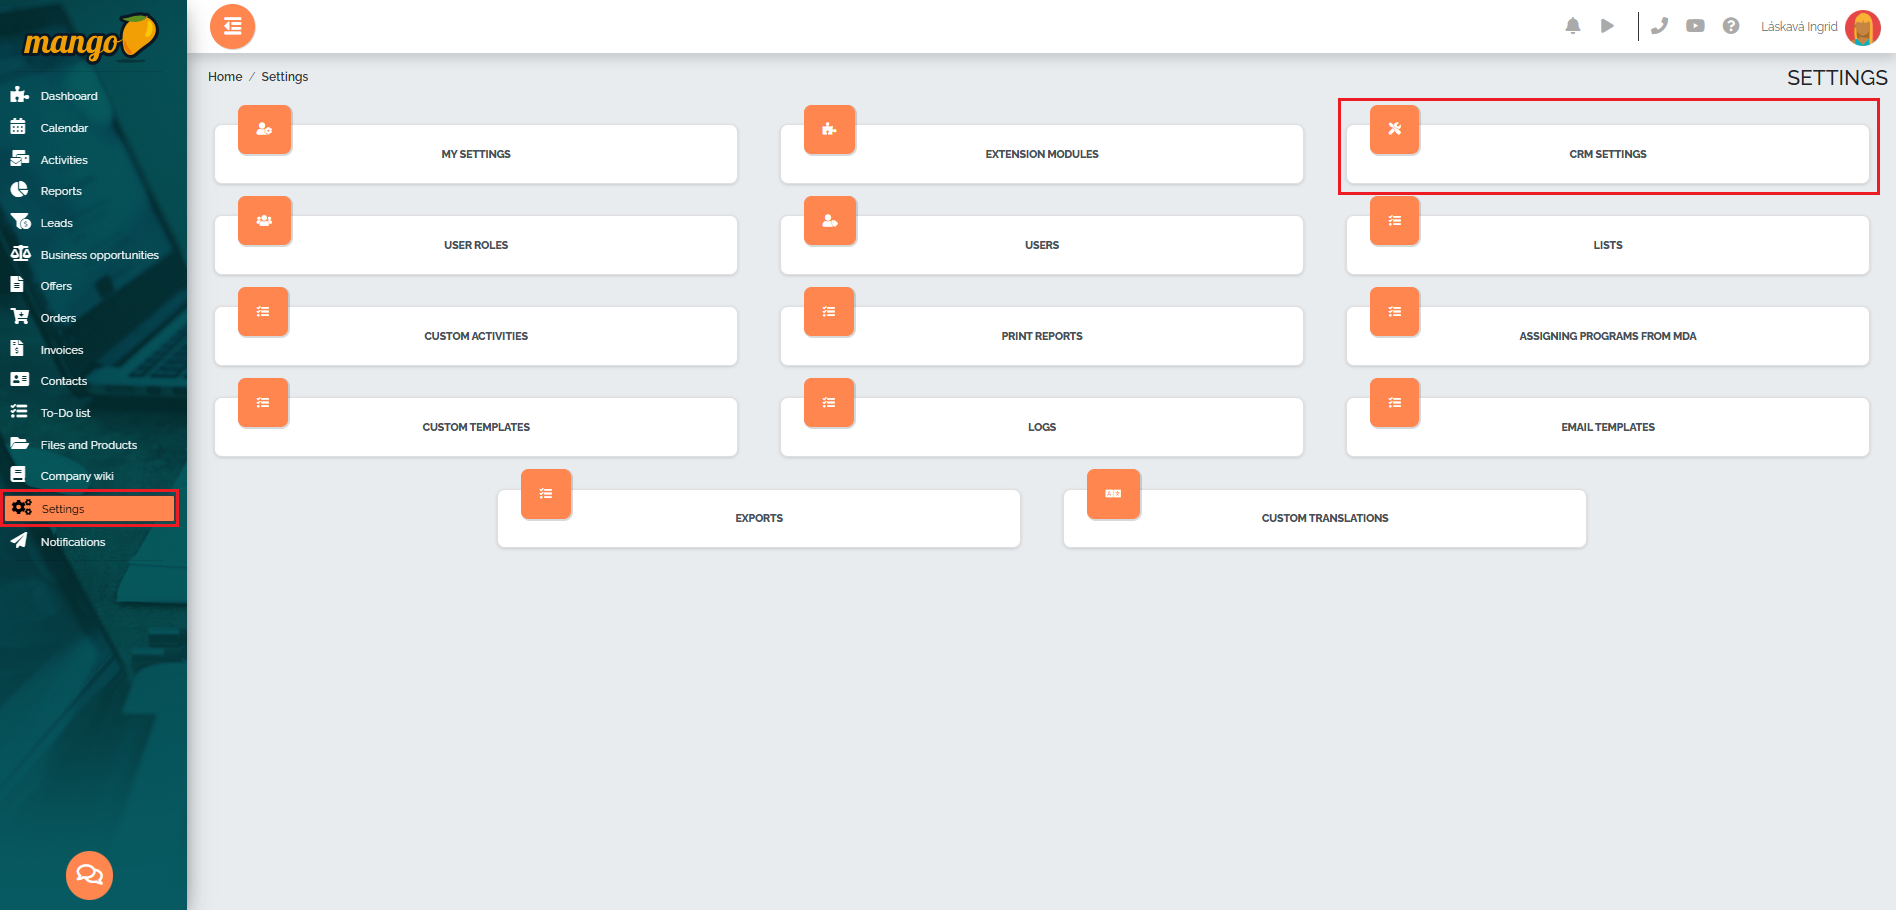
All available CRM settings will then be displayed, divided into individual tabs - Basic Settings, Security, Address Book, Quotes, Orders, Activities, Documents and Products, Leads, Business Opportunities, Field Settings, Reports, Invoices, Users.
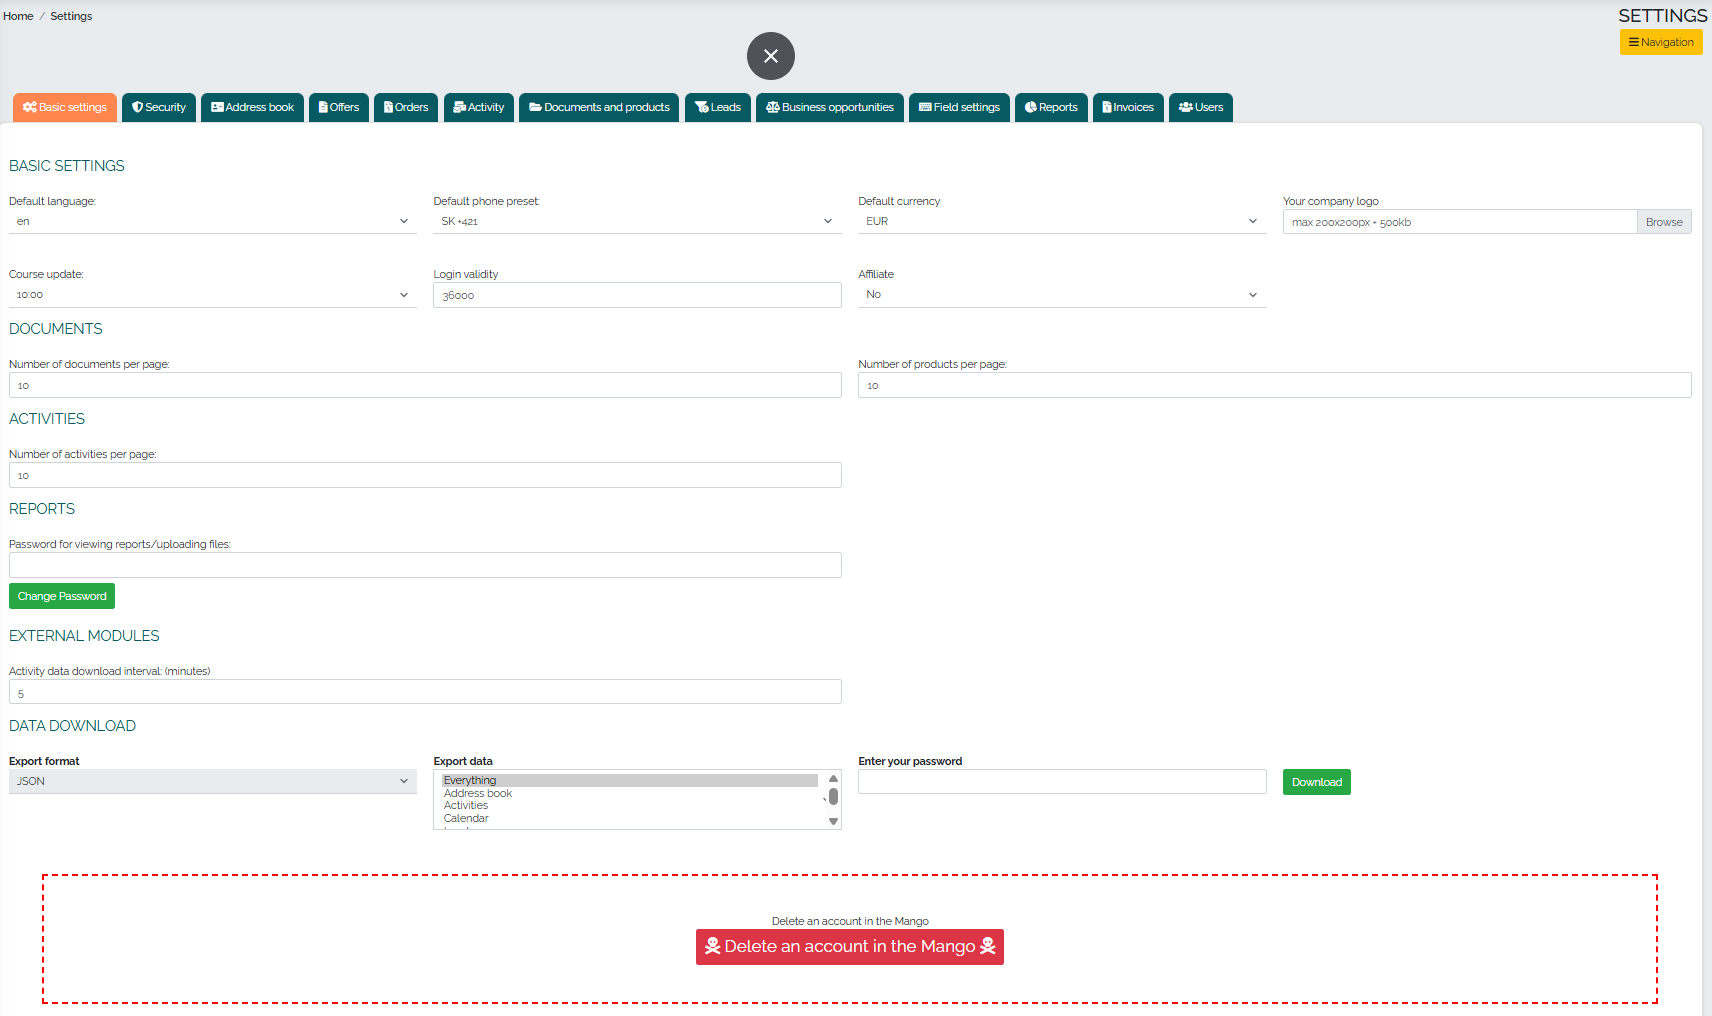
In the first tab called Basic Settings, we can set the default language, telephone area code, currency, company logo, course update, login validity, affiliate campaigns, as well as the number of documents and products per page, the number of activities per page, the password for opening reports, and the interval for downloading data to activities. In this section of settings, you can also set data download and cancellation of the Mango account.
In the Security tab, we can enable logging into our account from multiple devices at the same time:

In the Address Book tab, we can find several subcategories. The first is Detailed table settings, where we can set the default number of documents per page, credit limit, invoice due date, or display different columns by contact type. Here we can also enable/disable duplicate storage of Company ID and VAT ID:

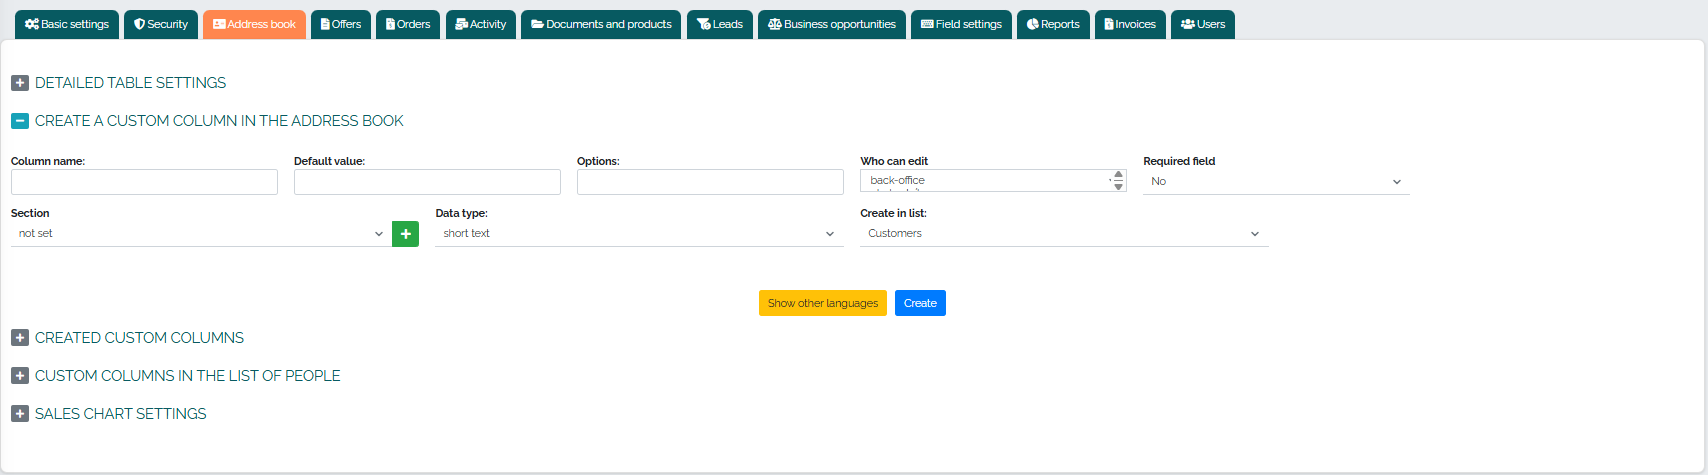
In the second subcategory, we can create custom columns in the business directory or the people directory:
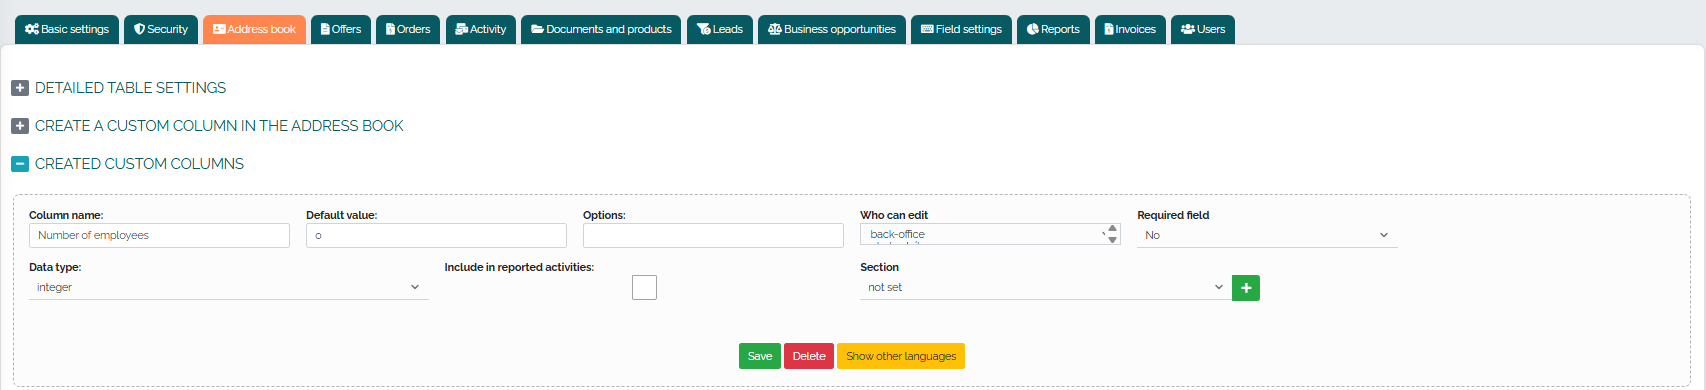
In the third subcategory, we can edit and manage custom columns created in the company directory:
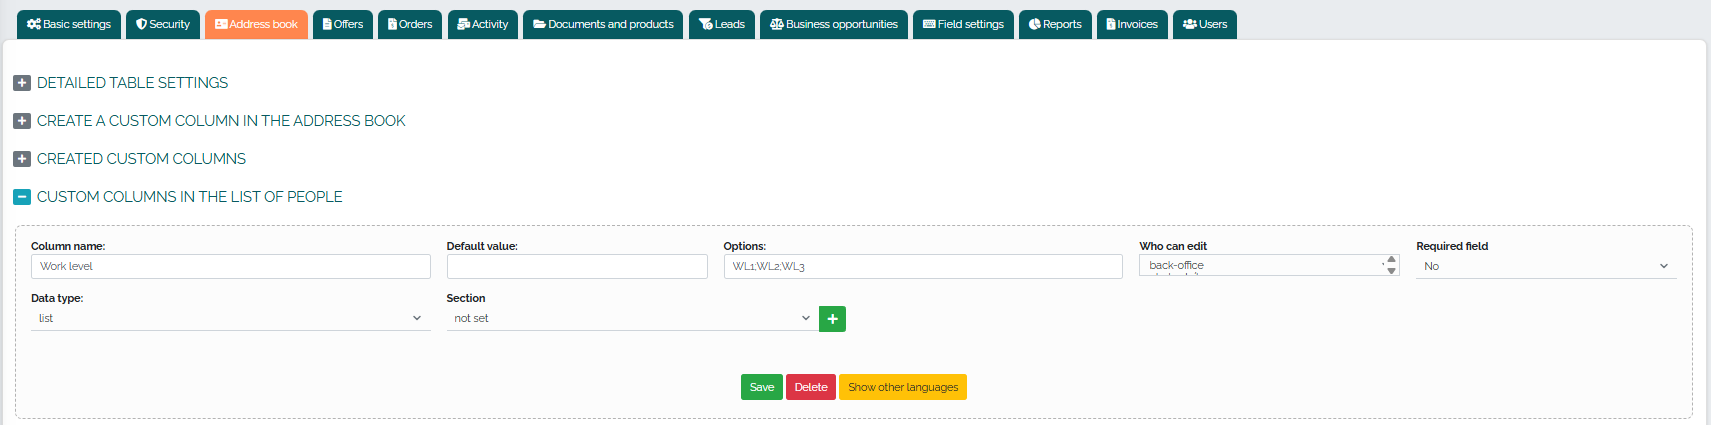
In the next subcategory, we can manage and edit our own columns that we created in the people directory:
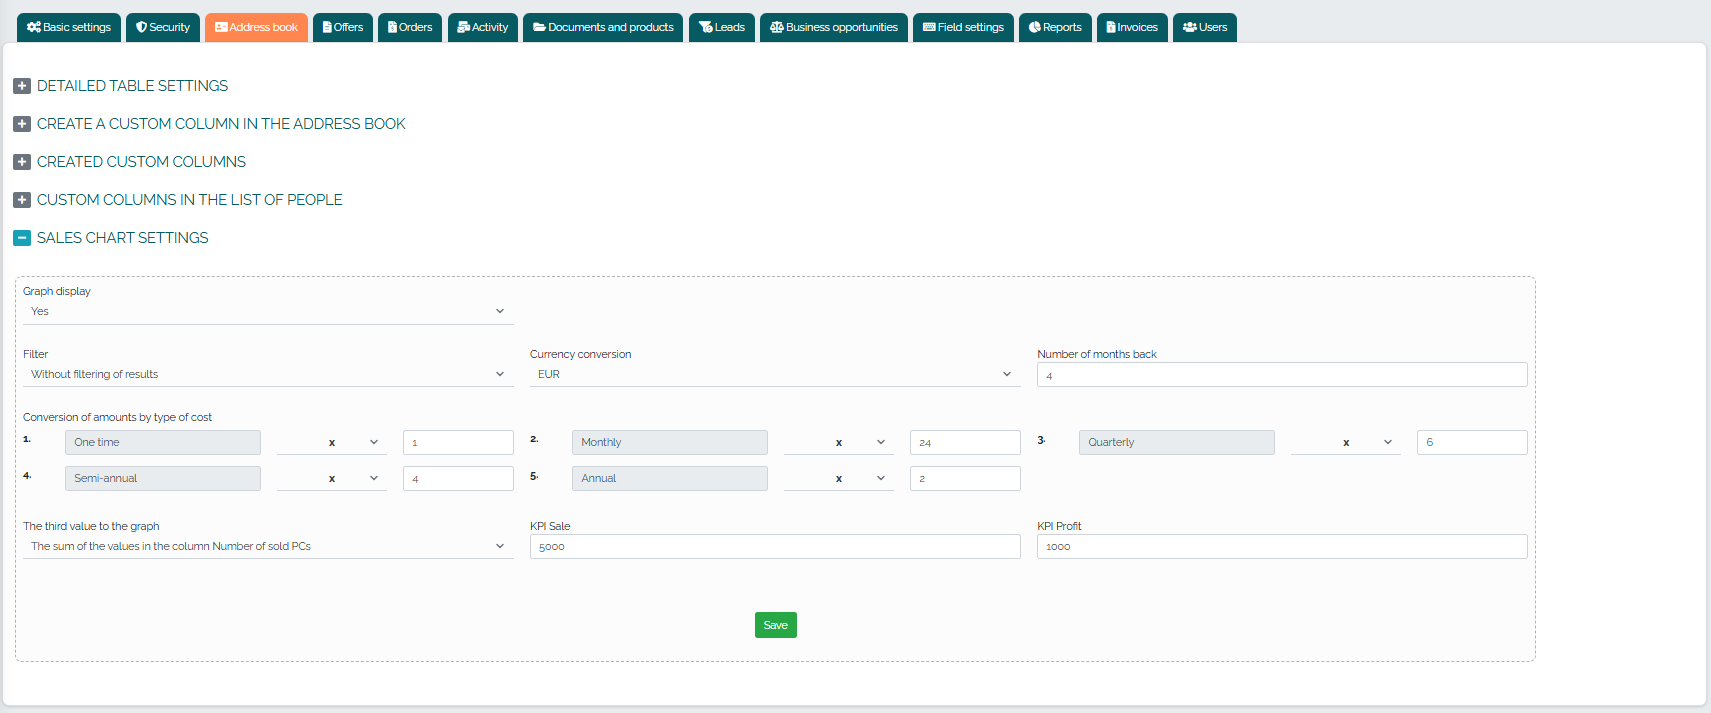
The last point concerns the Sales Graph Settings, where you can set the graph display and possibly a filter, currency conversion, number of months back, conversion of amounts by type of expense, the third value in the graph, profit and sales KPIs:
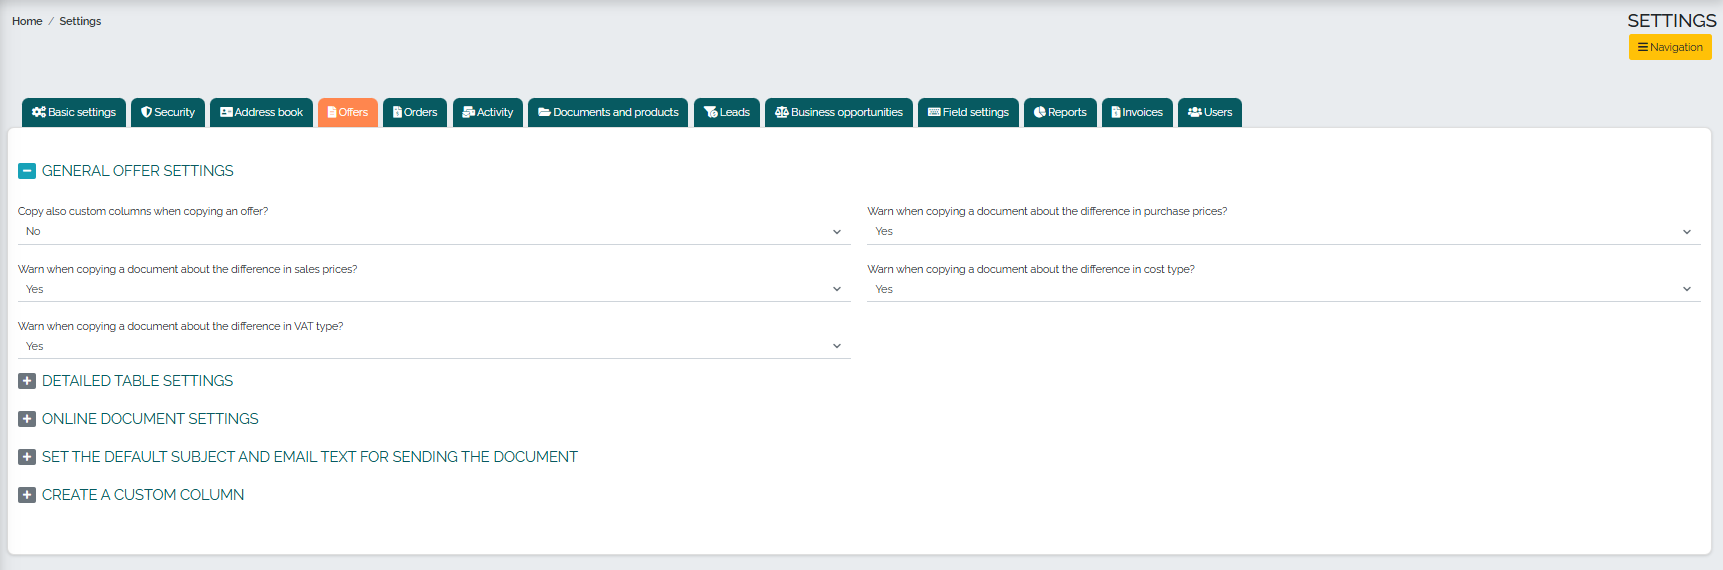
The Offers tab contains 5 subcategories. In the first one we find General Offer Settings, where we can edit, for example, copying custom columns when copying an offer, warning when copying documents about differences in purchase/sale prices, differences in cargo type or VAT type:
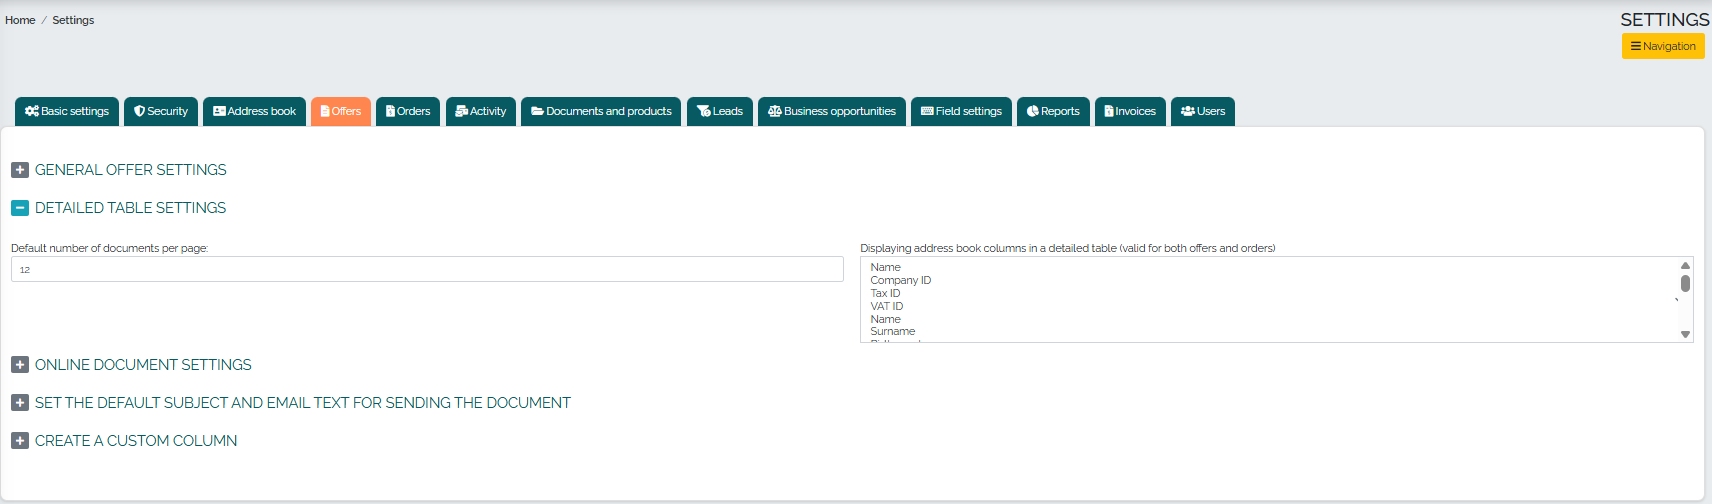
The second subcategory is Detail table settings, where we can set the number of table documents per page and also display directory columns in the detail table:
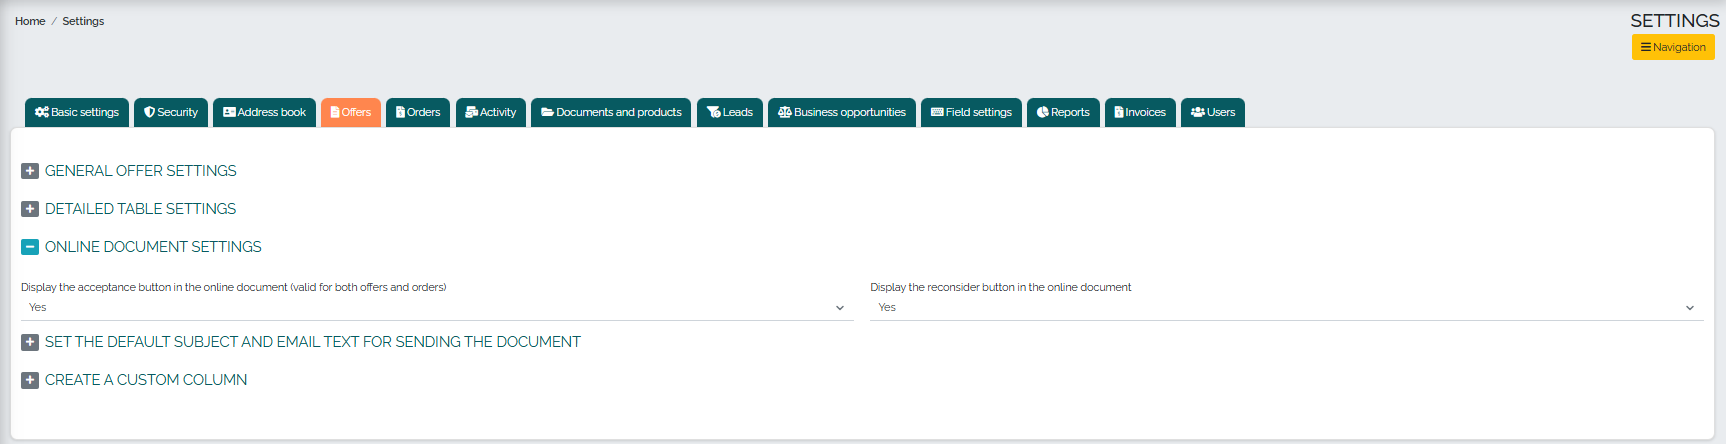
The third subcategory is Online Document Settings, where we can choose to display the acceptance button in the online document (valid for both quotes and orders) and also display the review button in the online document:
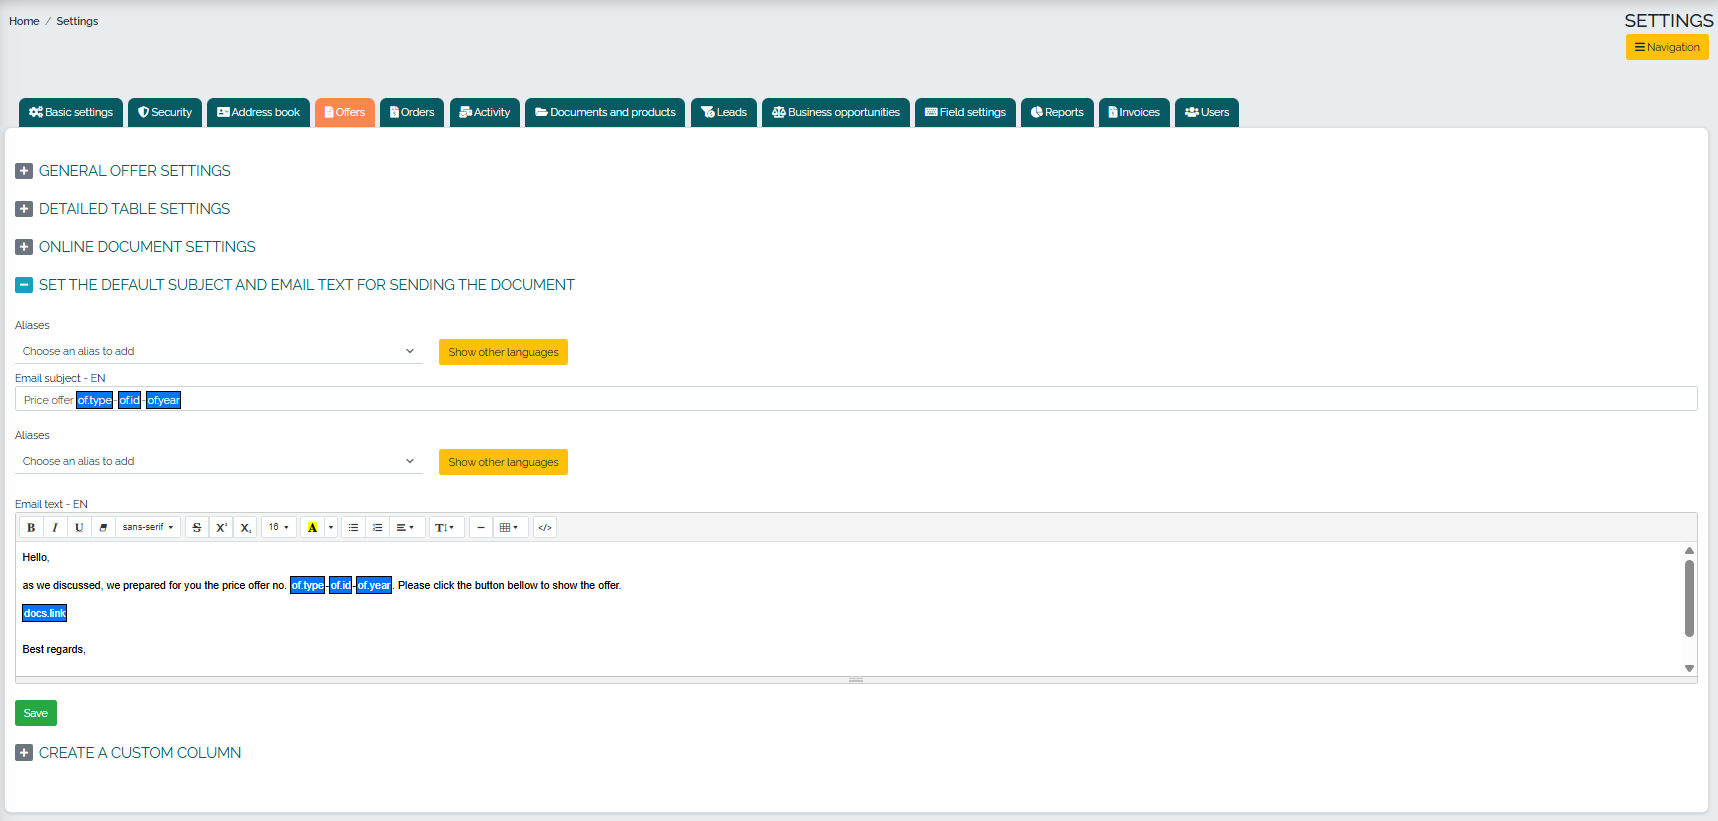
Another category called Setting the default email subject and text for sending a document offers editing the alias, subject, and text of the email that we send along with the online document:
In the last option called Create Custom Column, you can create your own column in the menus if needed: 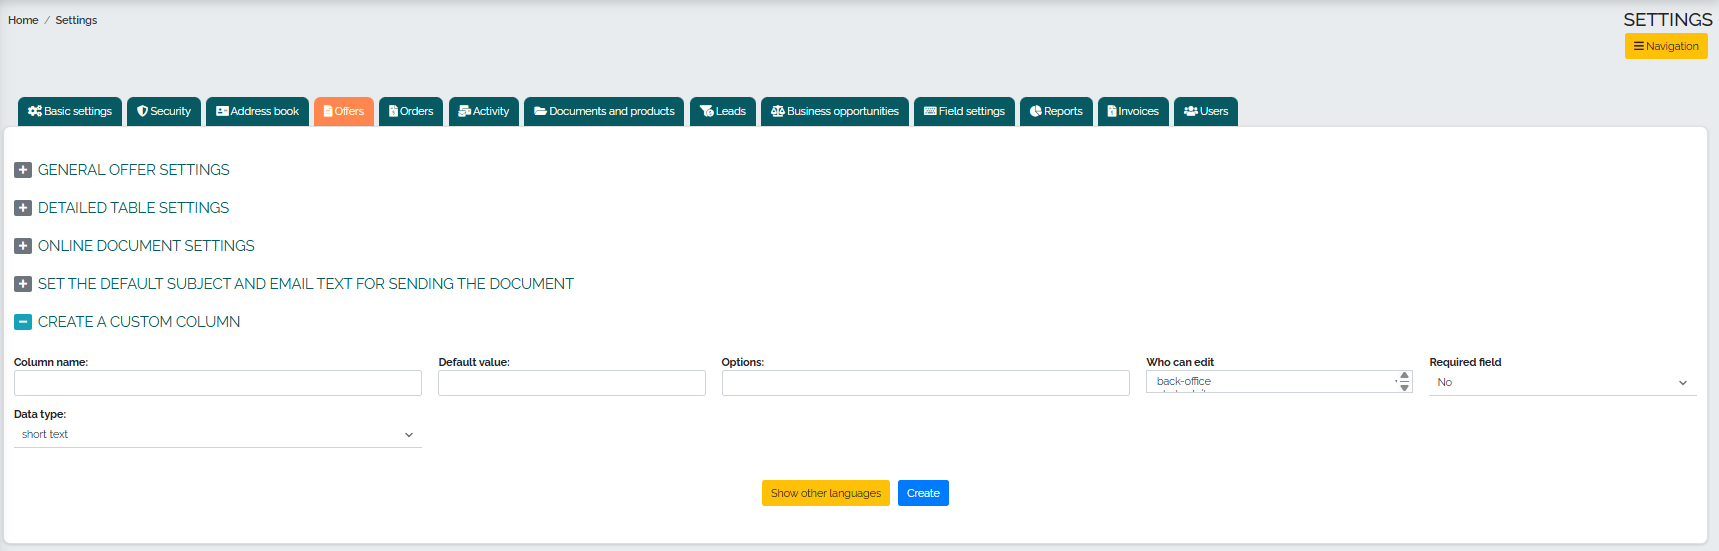
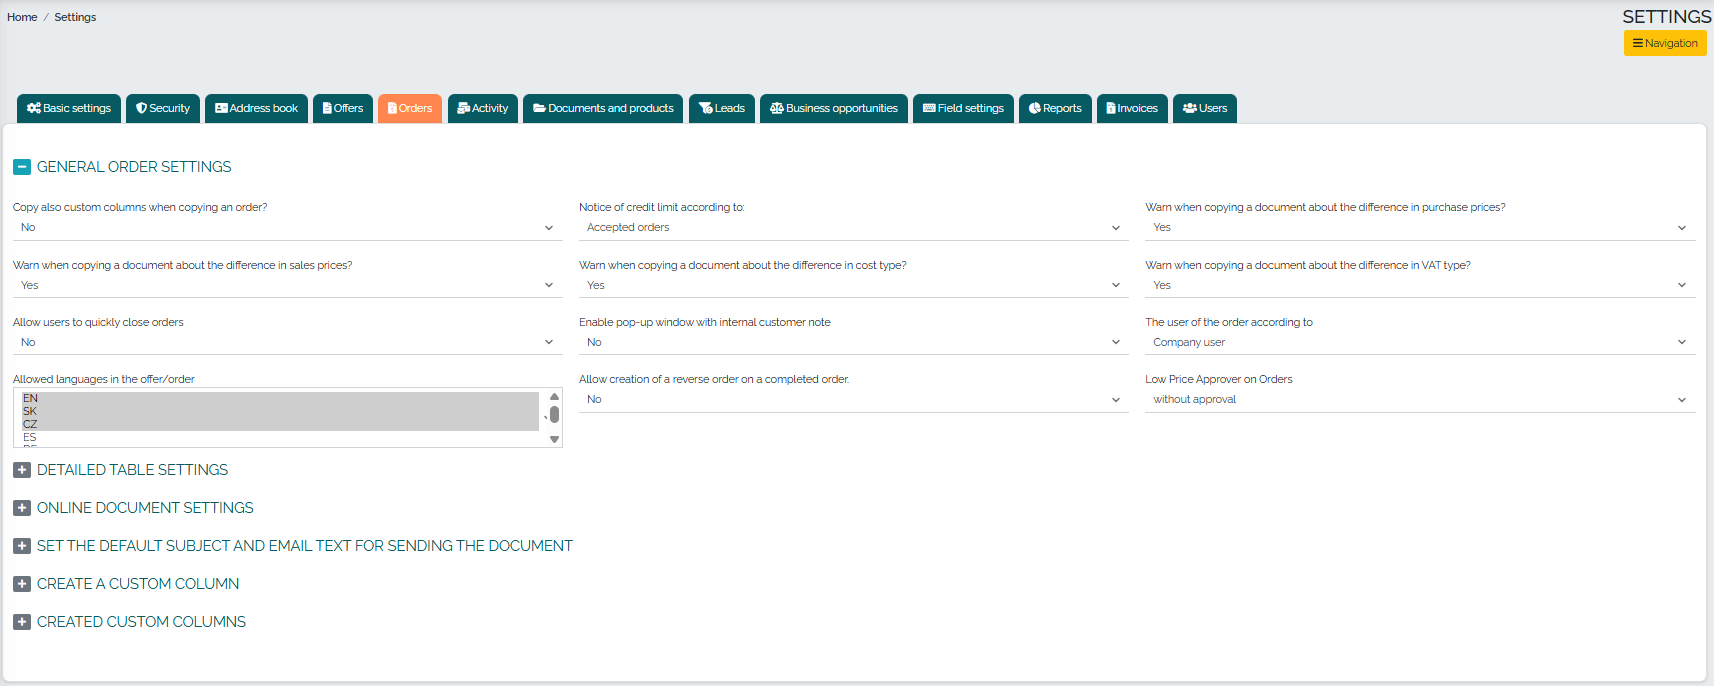
The Orders tab has 6 subcategories, and in the first one, called General Order Settings, we can edit, for example, copying custom columns when copying an order, credit limit notification, notification when copying documents for differences in purchase/sales prices, differences in cargo type or VAT type. We can also allow users to expedite order closing, enable a pop-up window with an internal customer note, specify the order user by company/order creator, select allowed languages in offers and orders, enable the creation of a reverse order when an order is completed, and also the ability to approve low prices on orders:
In the Detail Table Settings subcategory, we can set the default number of table documents per page and also choose to display directory columns in the detail table: 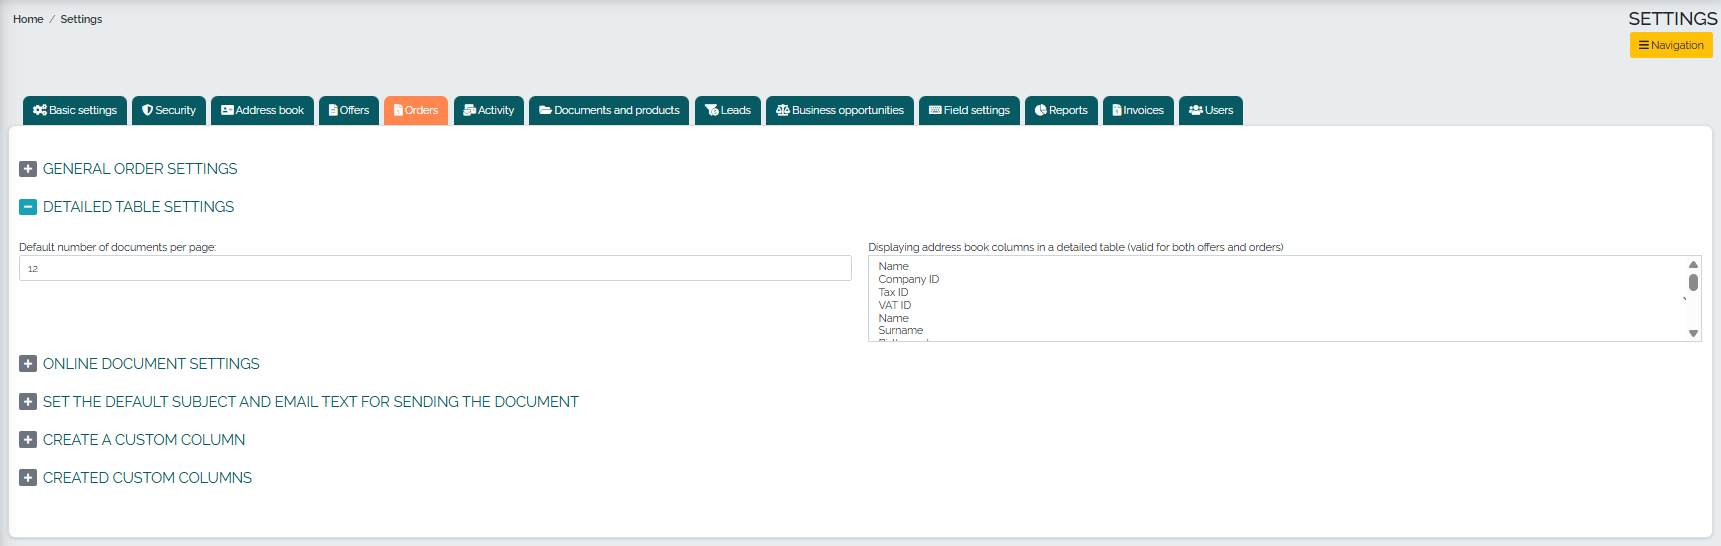
Another subcategory is Online Document Settings, where we can choose to display the acceptance button in the online document (valid for both quotes and orders) and also display the review button in the online document: 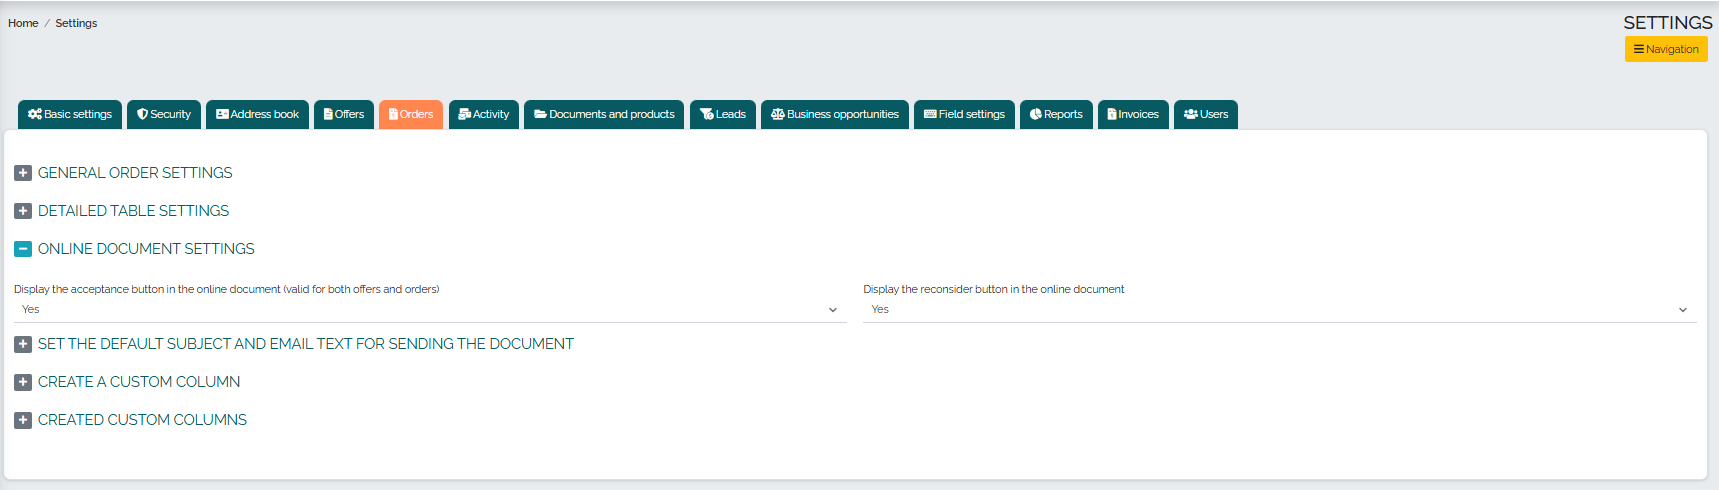
In the following subcategory titled Setting the default subject and email text for sending a document, we can set the alias, subject, and email text for sending an online document: 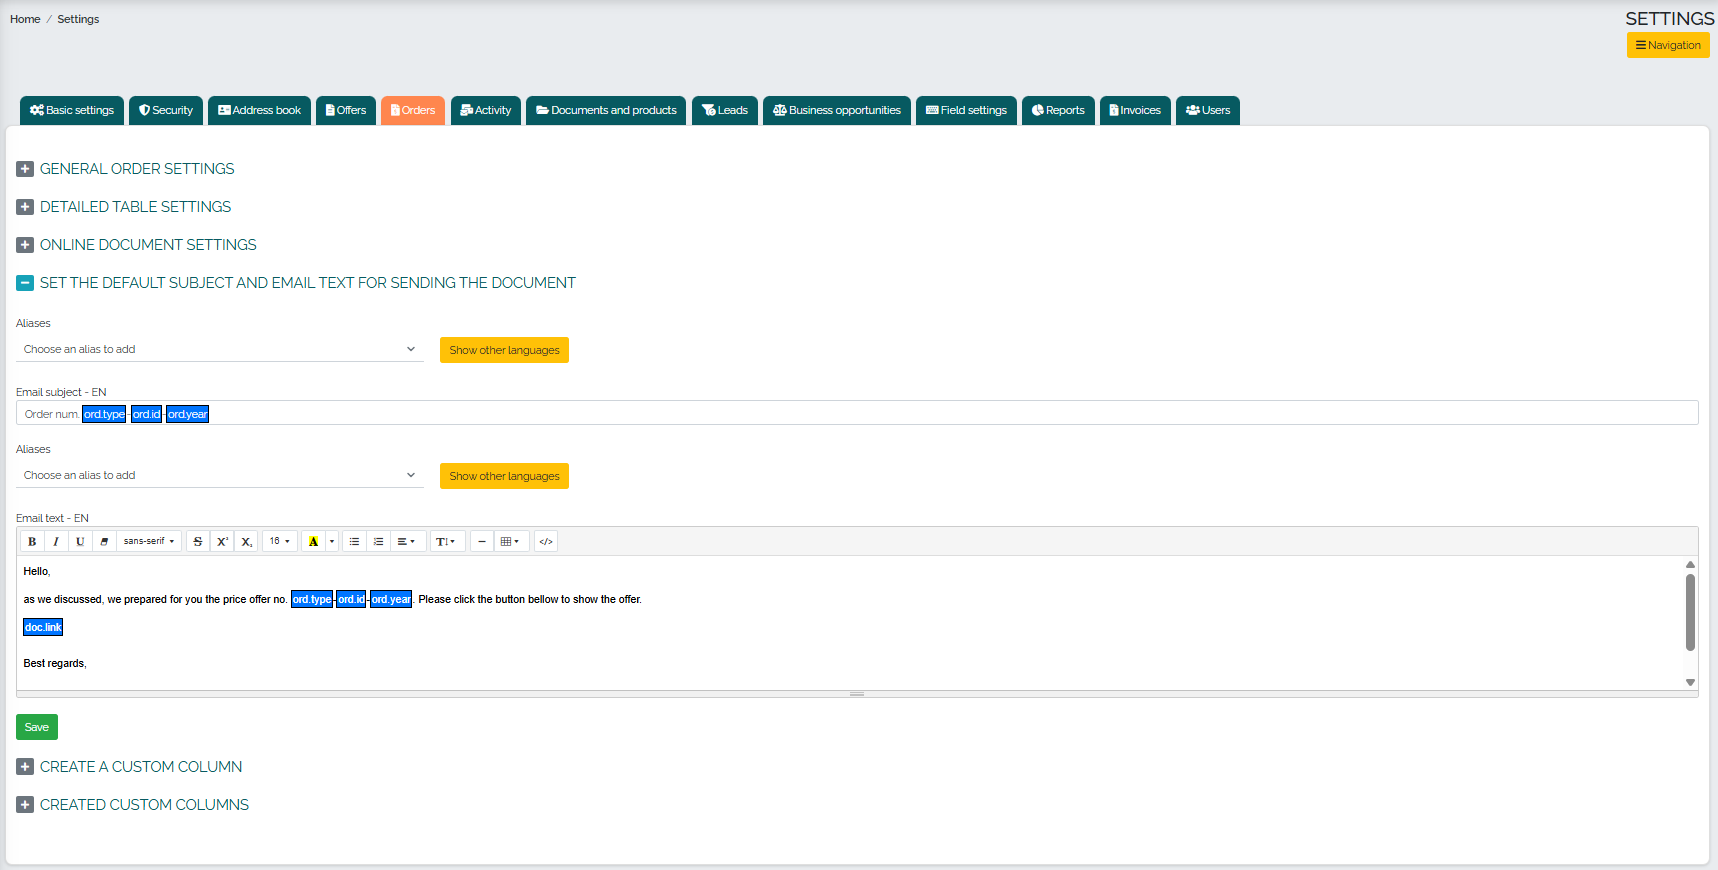
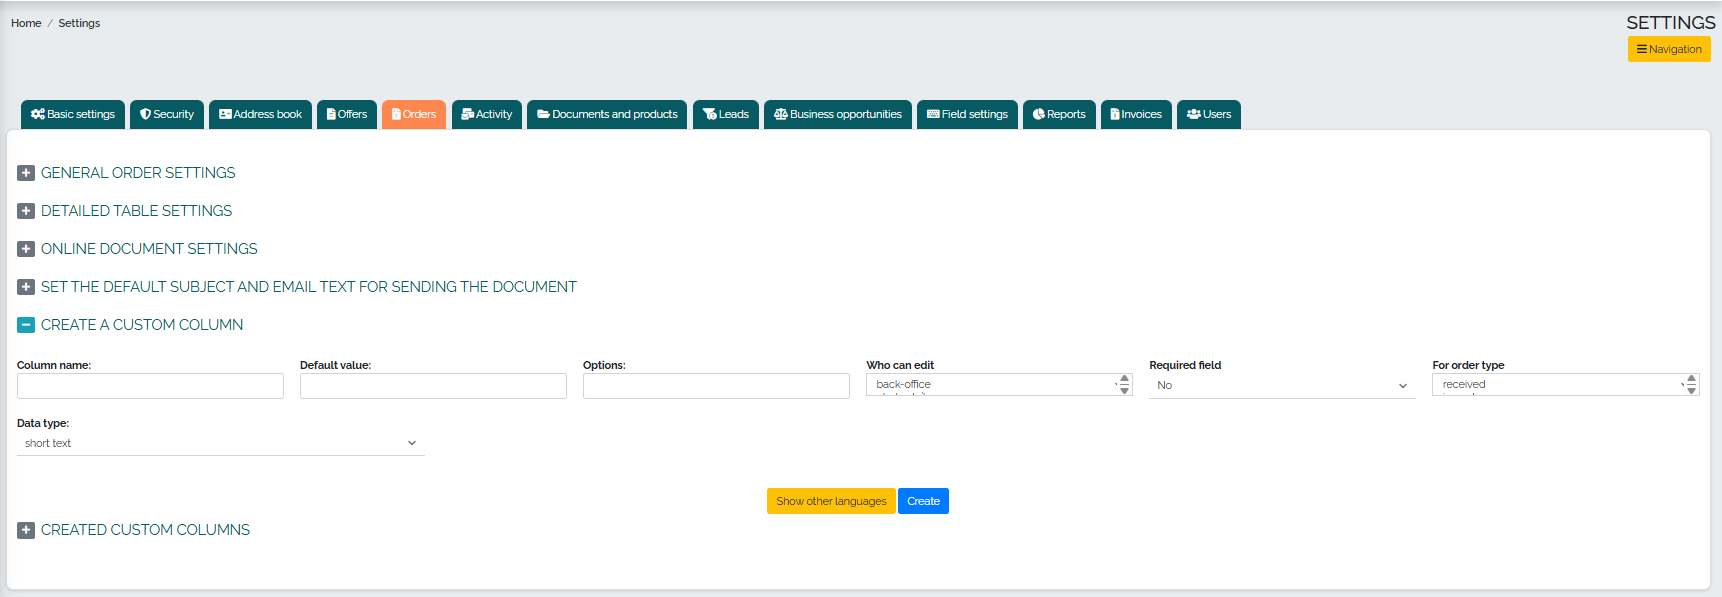
The penultimate subcategory offers the creation of a custom column in orders:
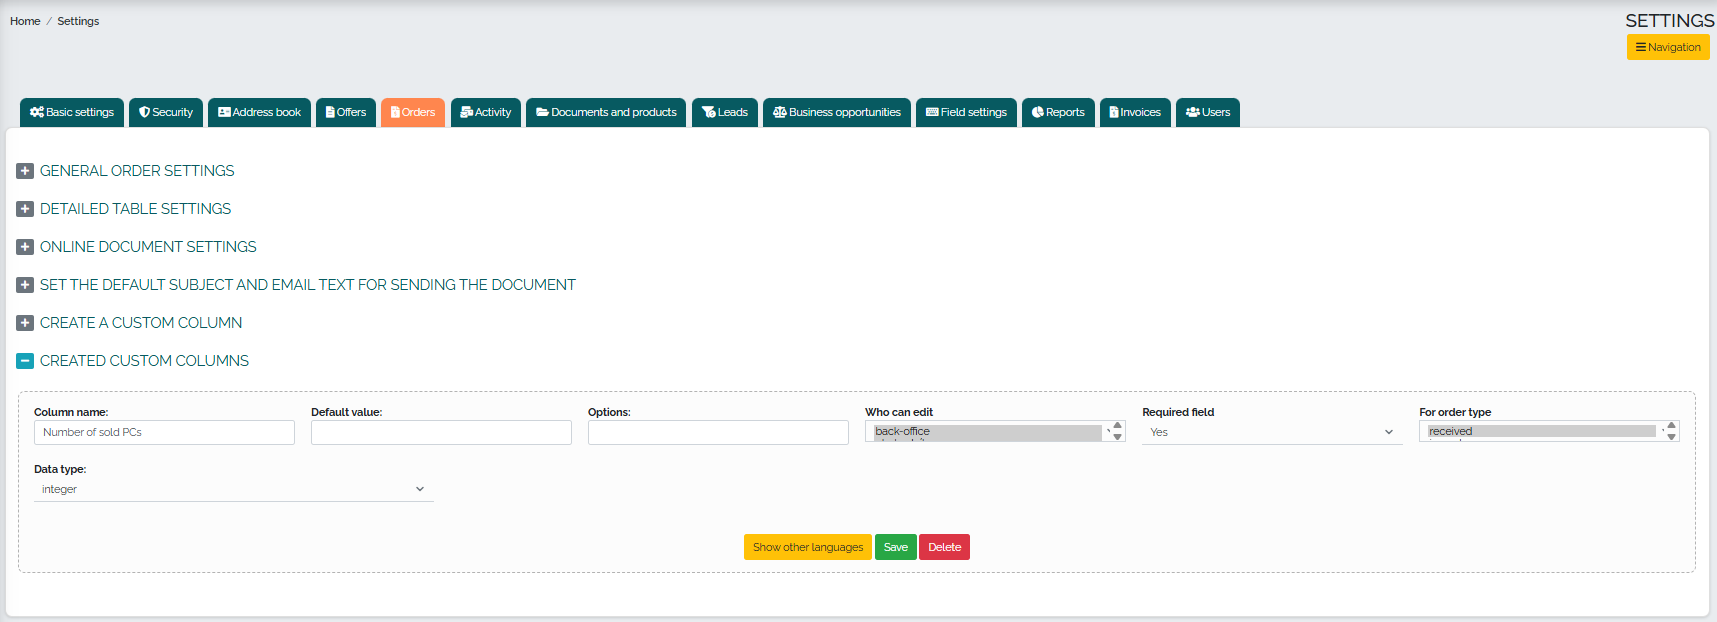
Finally, we can edit the columns already created in our orders:
The tab called Activities offers the option to not/not include the person filled in when sending the report, as well as settings for updating data in the address book when creating individual types of activities - phone call, email, meeting, travel, etc.: 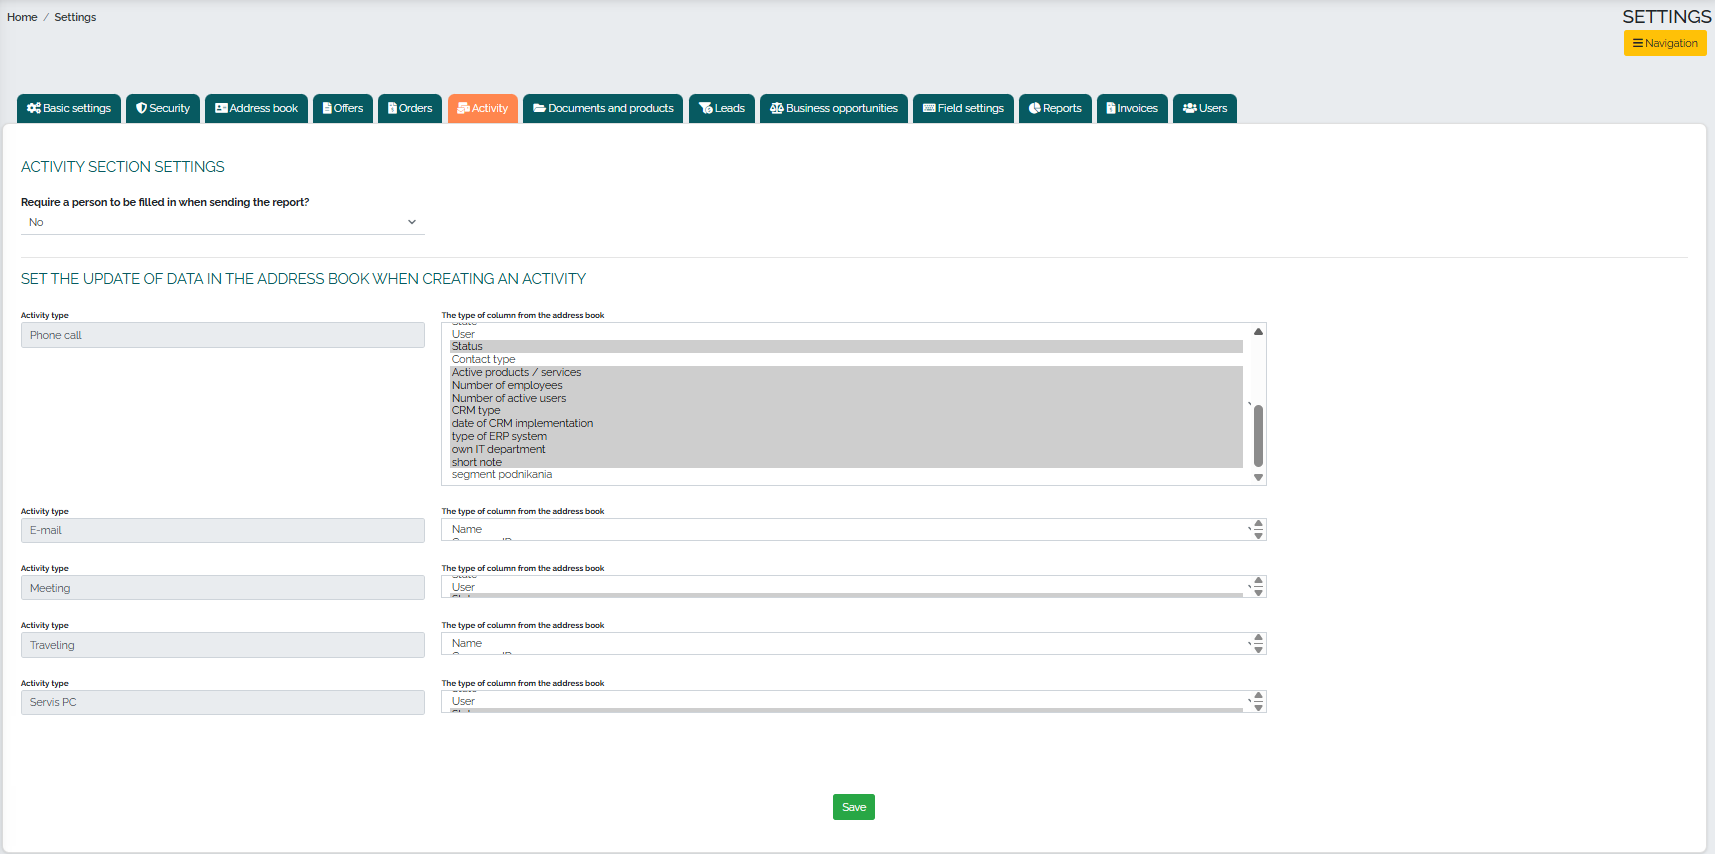
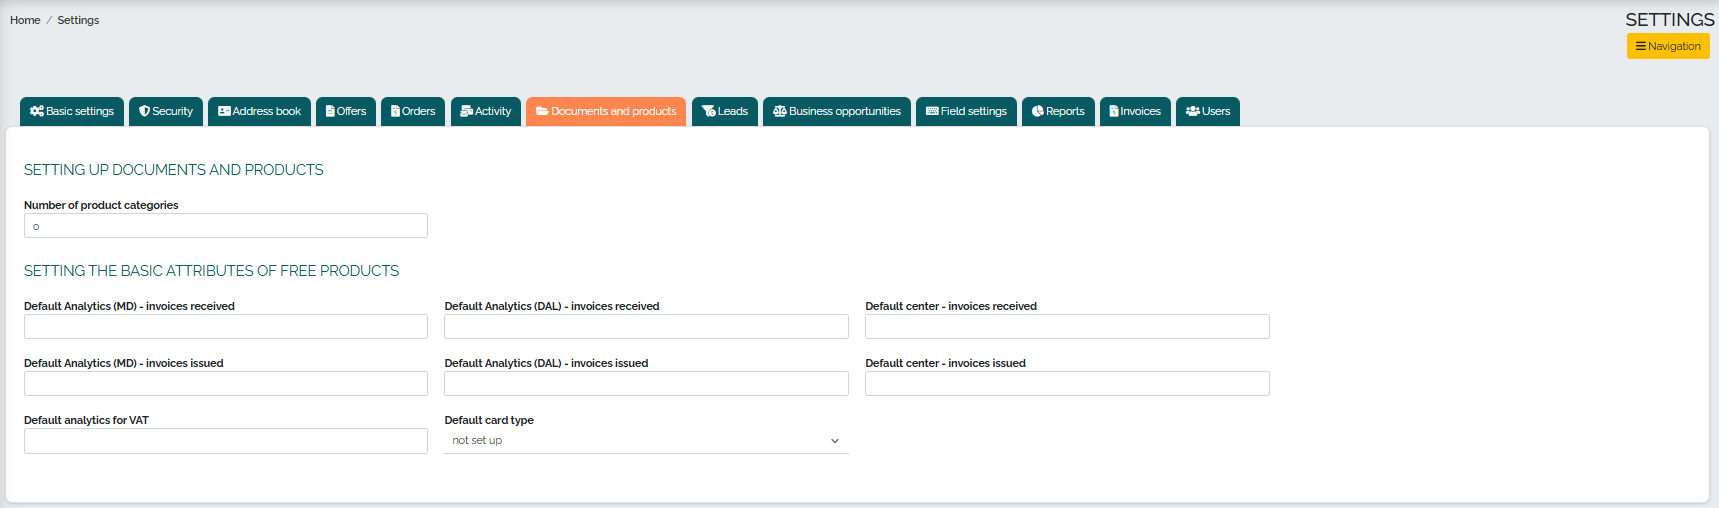
In the tab called Documents and Products, we can set the number of product categories and also set the basic attributes of free products:
The Leads tab offers the option to assign a new lead either to the lead creator or to leave it unassigned:

There are 3 subcategories in the Opportunities tab. The first subcategory concerns the settings of opportunities, where it is possible to determine whether a reason for winning or losing should be required when closing a deal, the ability to choose different workflows, and the definition of basic types of sales for opportunities: 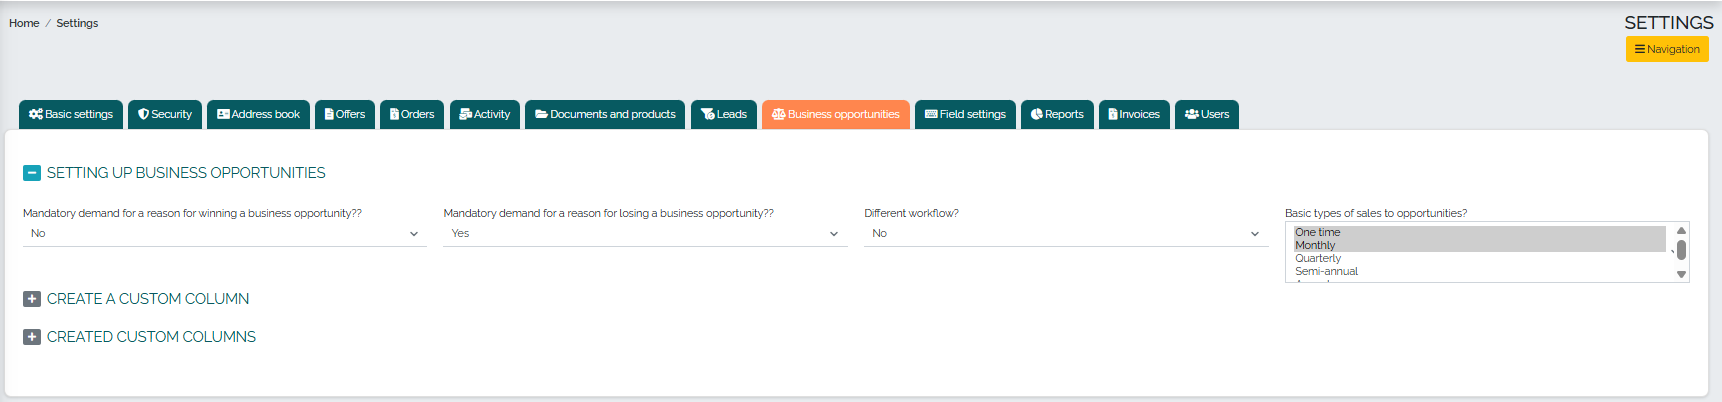
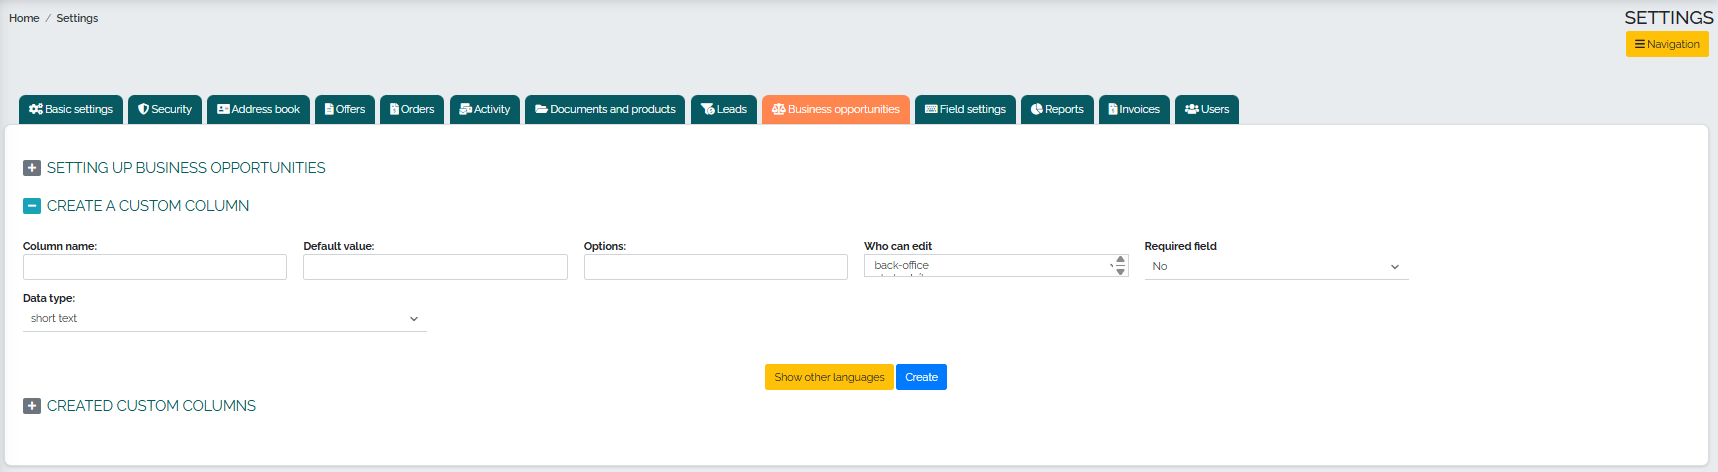
In the second subcategory, you can create your own column within business opportunities:
In the last subcategory, you can edit already created custom columns:

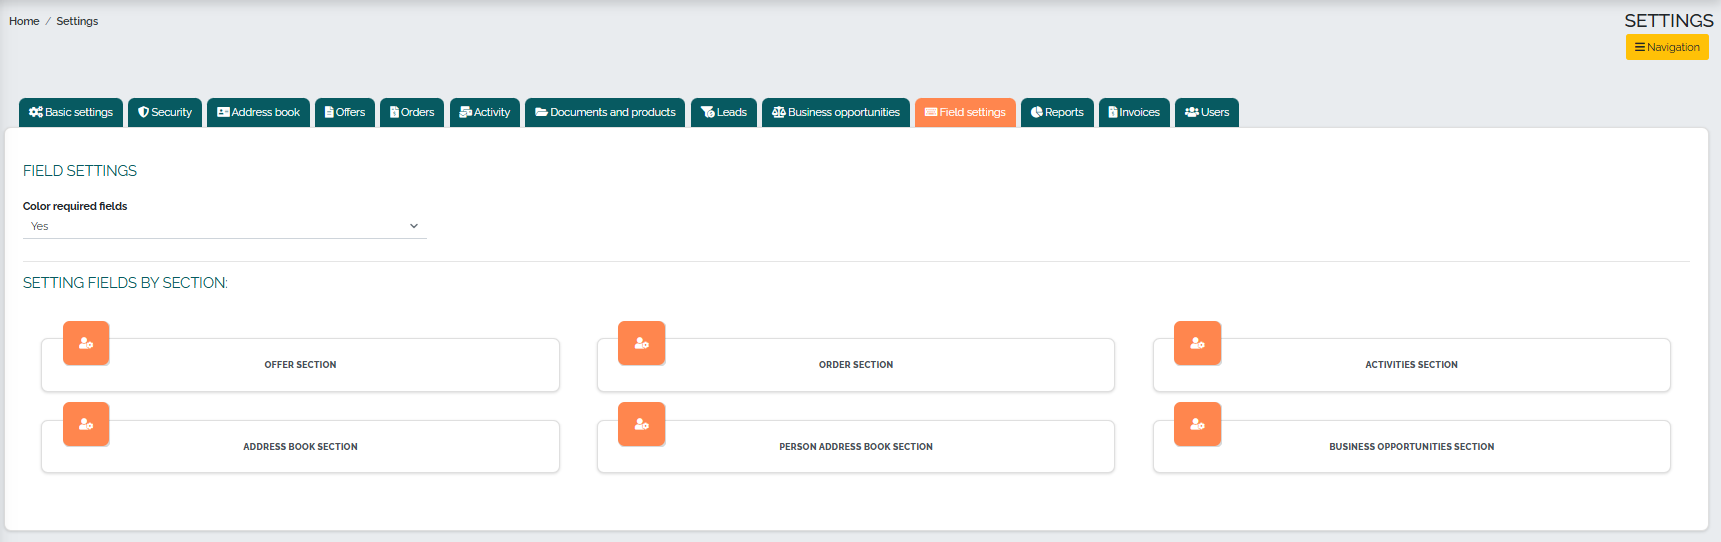
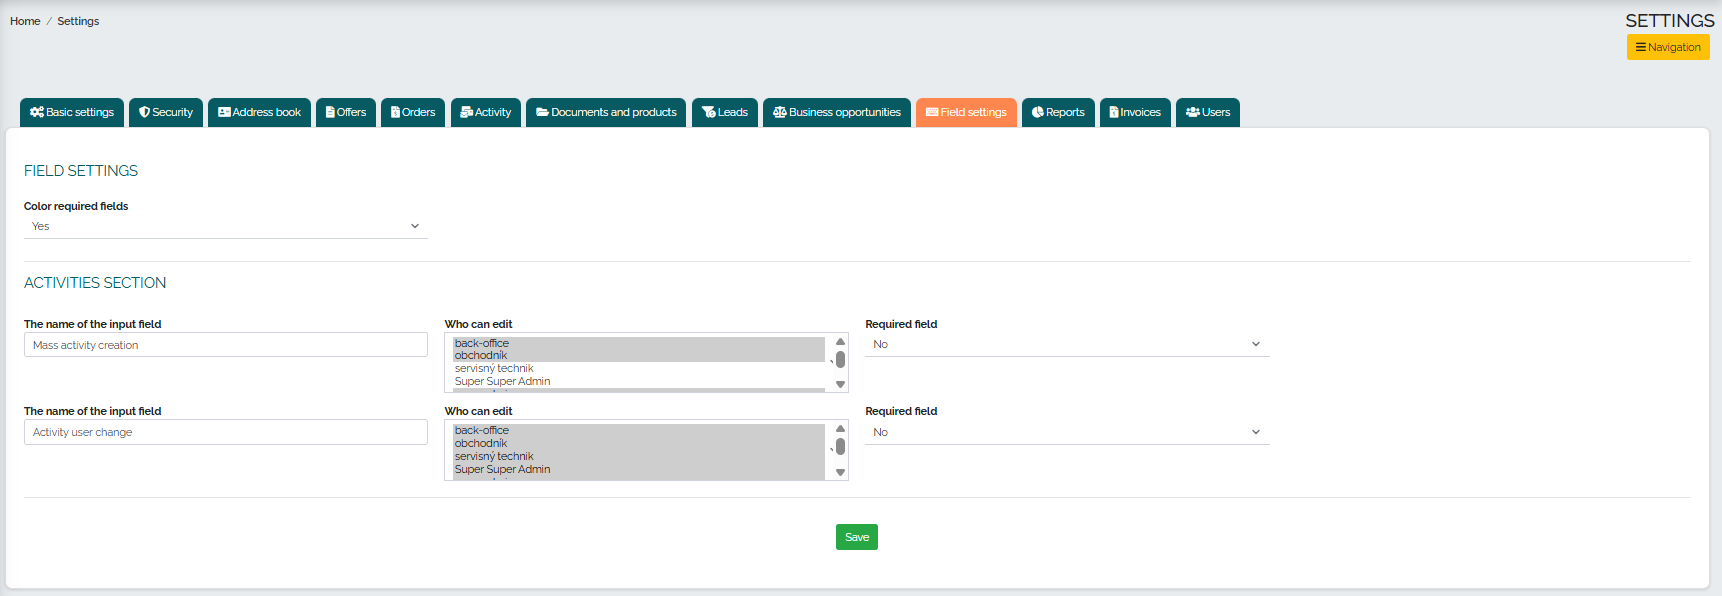
In the tab called Field Settings, Mango offers us the option to set the background color of mandatory fields and also an extended menu of field settings, which are divided into 6 subcategories according to sections: Offers, Orders, Activities, Address Book, Person Address Book, and Business Opportunities.
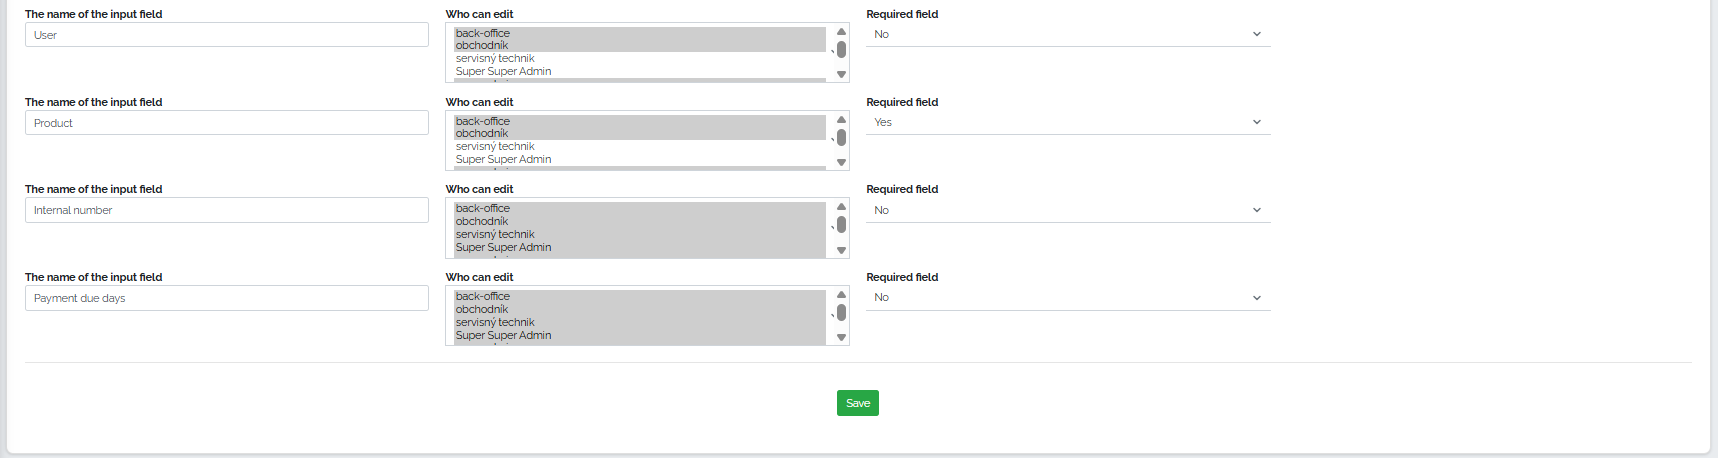
In the Offers section, we can edit the properties of individual input fields in the offer. First, we can set the option to highlight mandatory fields, and we can also choose who can edit individual input fields (e.g. superadmin, backoffice role) and also determine whether the field is a mandatory item or not: 

In the Orders section, we can edit the properties of individual order input fields. First, we can set the option to highlight mandatory fields, and we can also choose who can edit individual input fields (e.g. superadmin, backoffice role) and also determine whether the field is a mandatory item or not:

The Activities section allows you to highlight required fields and choose who can edit individual input fields (e.g. superadmin role, backoffice) and whether the field is a required item or not:
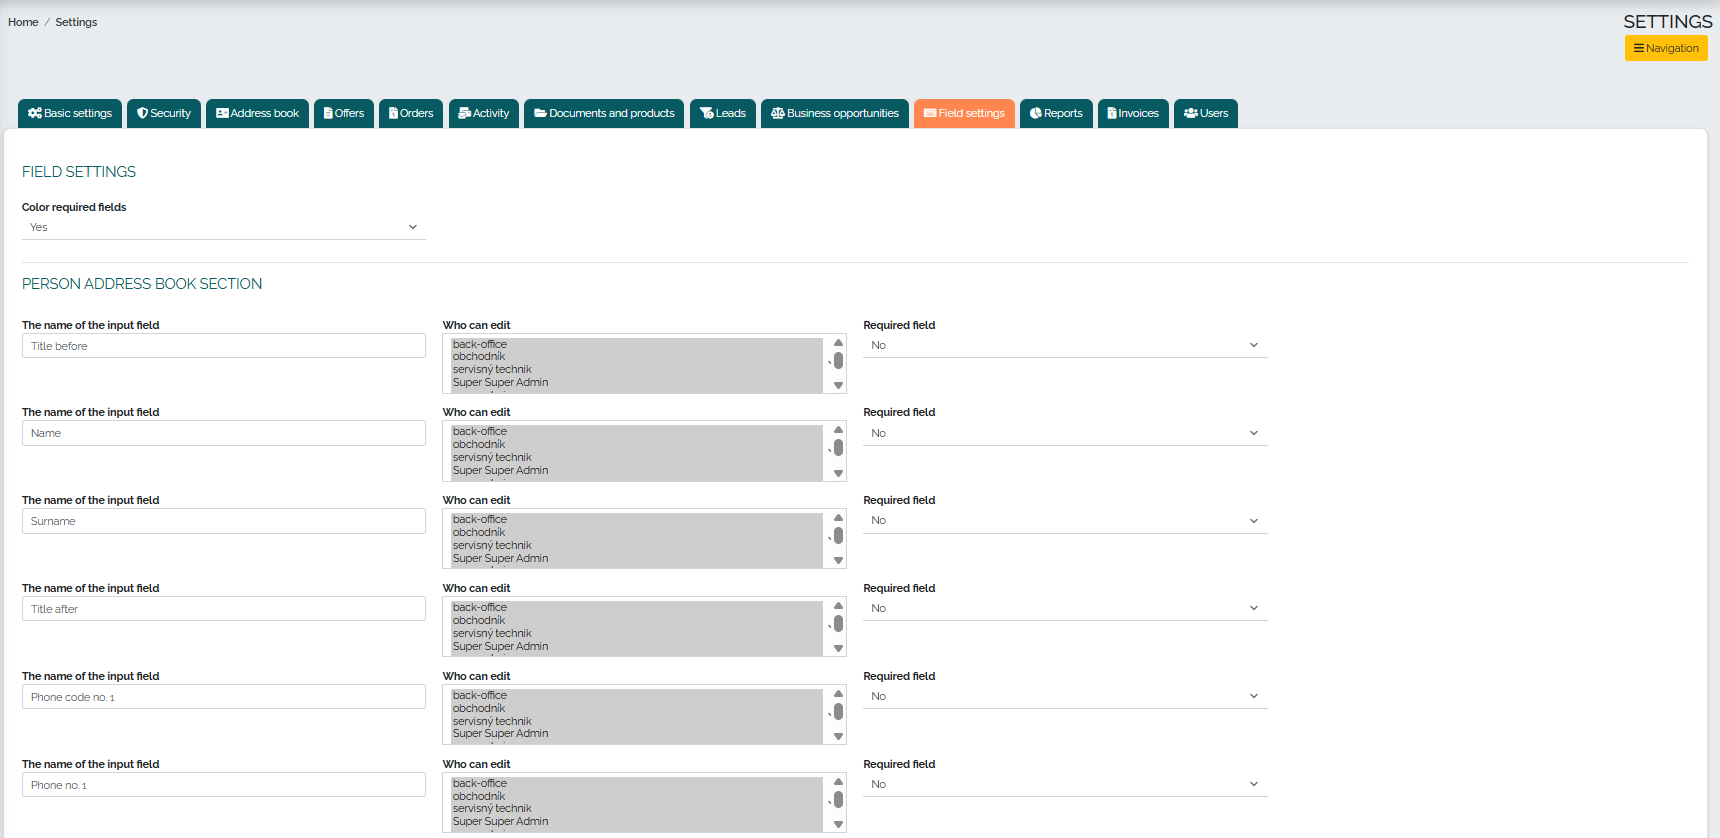
In the Address Book section, it offers users the option to highlight required fields and the ability to choose who can edit individual input fields (e.g. superadmin role, backoffice) and whether the field is a required item or not:

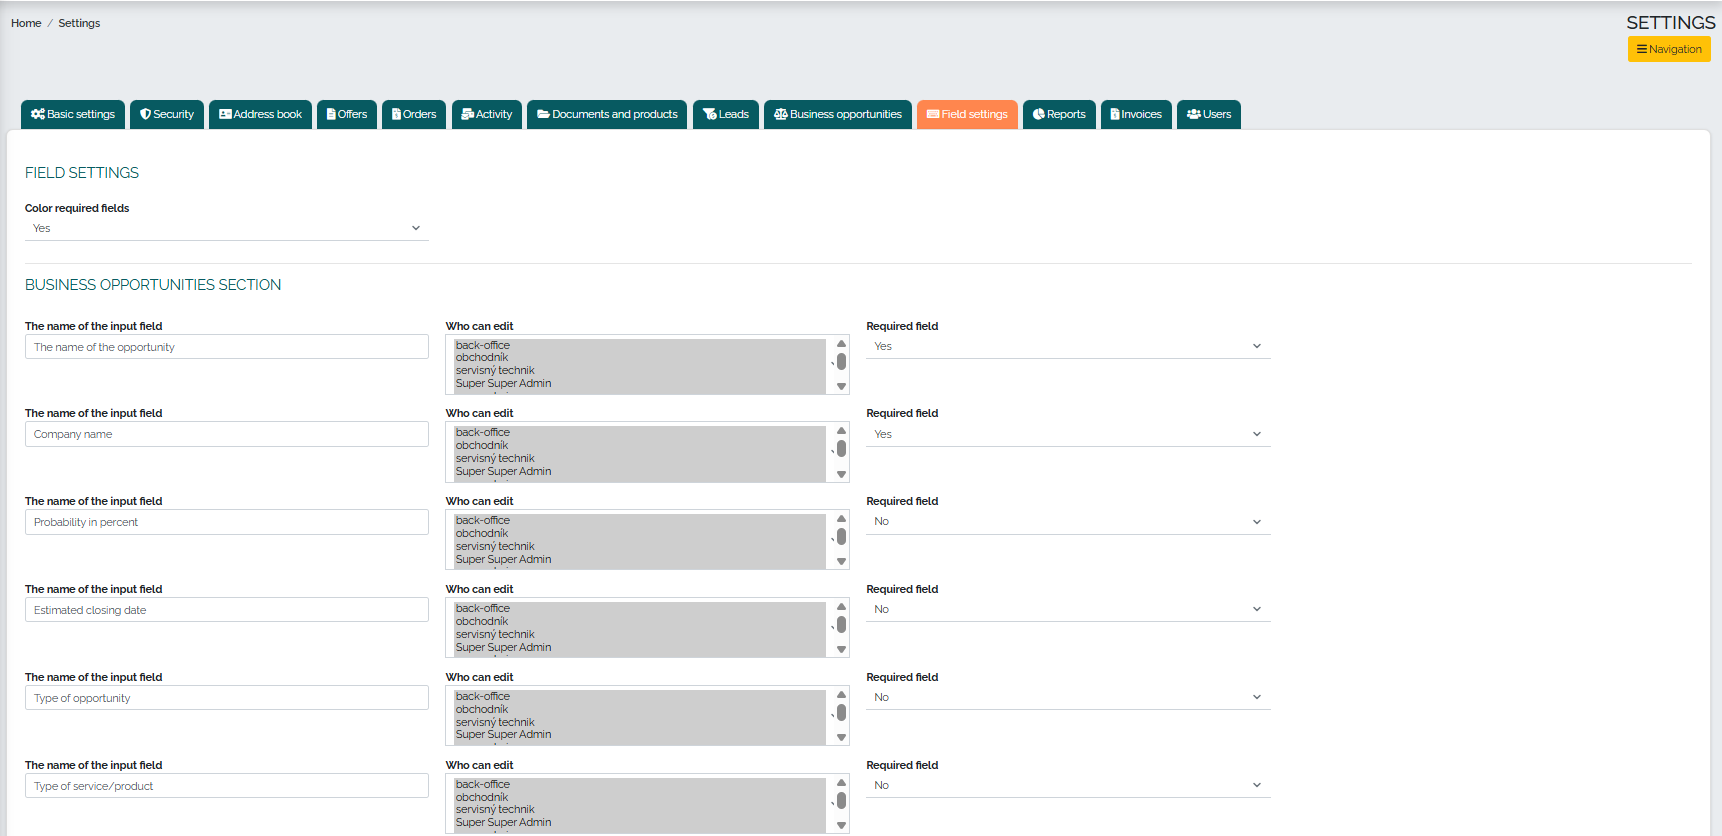
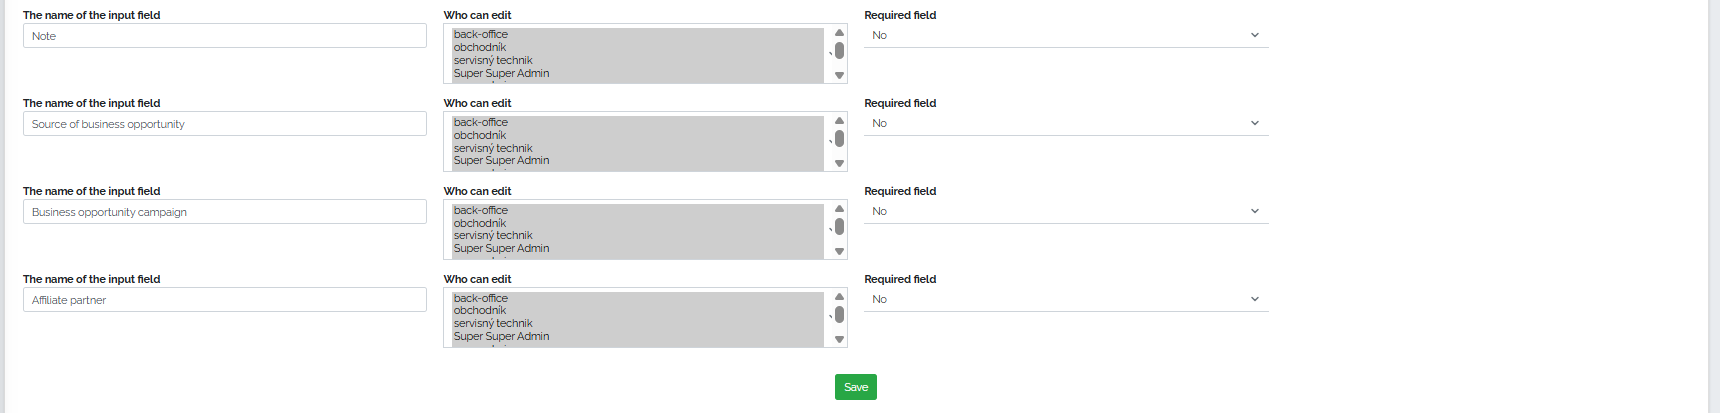
The Business Opportunities section also offers users the option to highlight required fields and choose who can edit individual input fields (e.g. superadmin role, backoffice) and whether the field is a required item or not:

In the Reports tab, you can create a new custom report and also set which user role can see this report: 
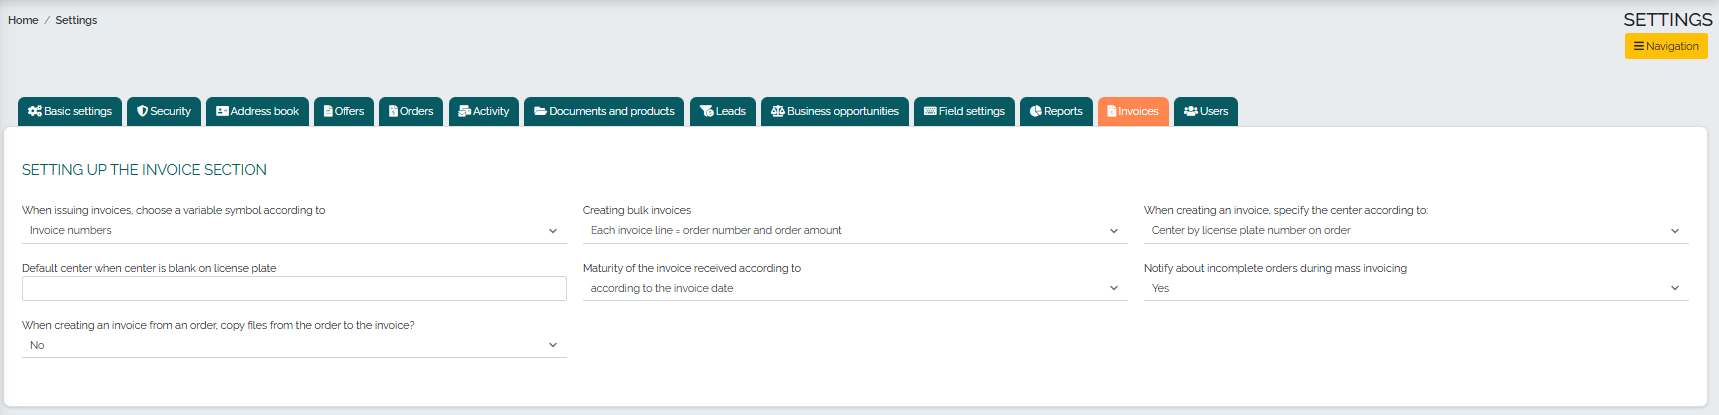
The tab called Invoices offers the option to set up the Invoice section - here the user defines the method of generating a variable symbol, creating mass invoices, the option to specify a default center, the method of calculating invoice due dates, set notifications for unfinished orders during invoicing, and the option to copy files from orders when issuing invoices directly to the invoice:
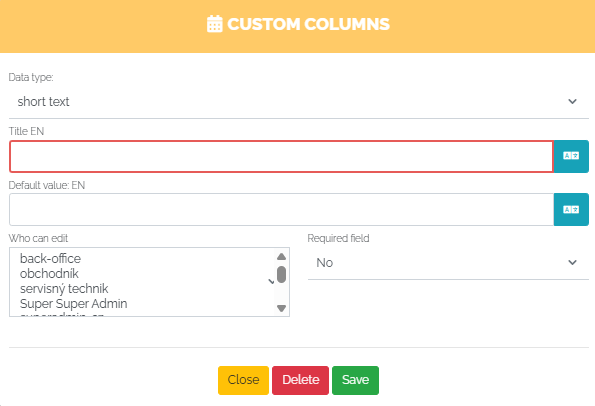
The last tab called Users provides the option to create a custom column in users - by simply clicking Create custom column, a new window will appear in which we can enter the column name, response type, whether this field is mandatory or not, and who can edit the field: