In CRM Mango, invoices can be issued in two ways:
- by manually entering data and subsequently issuing an invoice,
- by issuing an invoice directly from the order received.
1. Manual invoice issuance
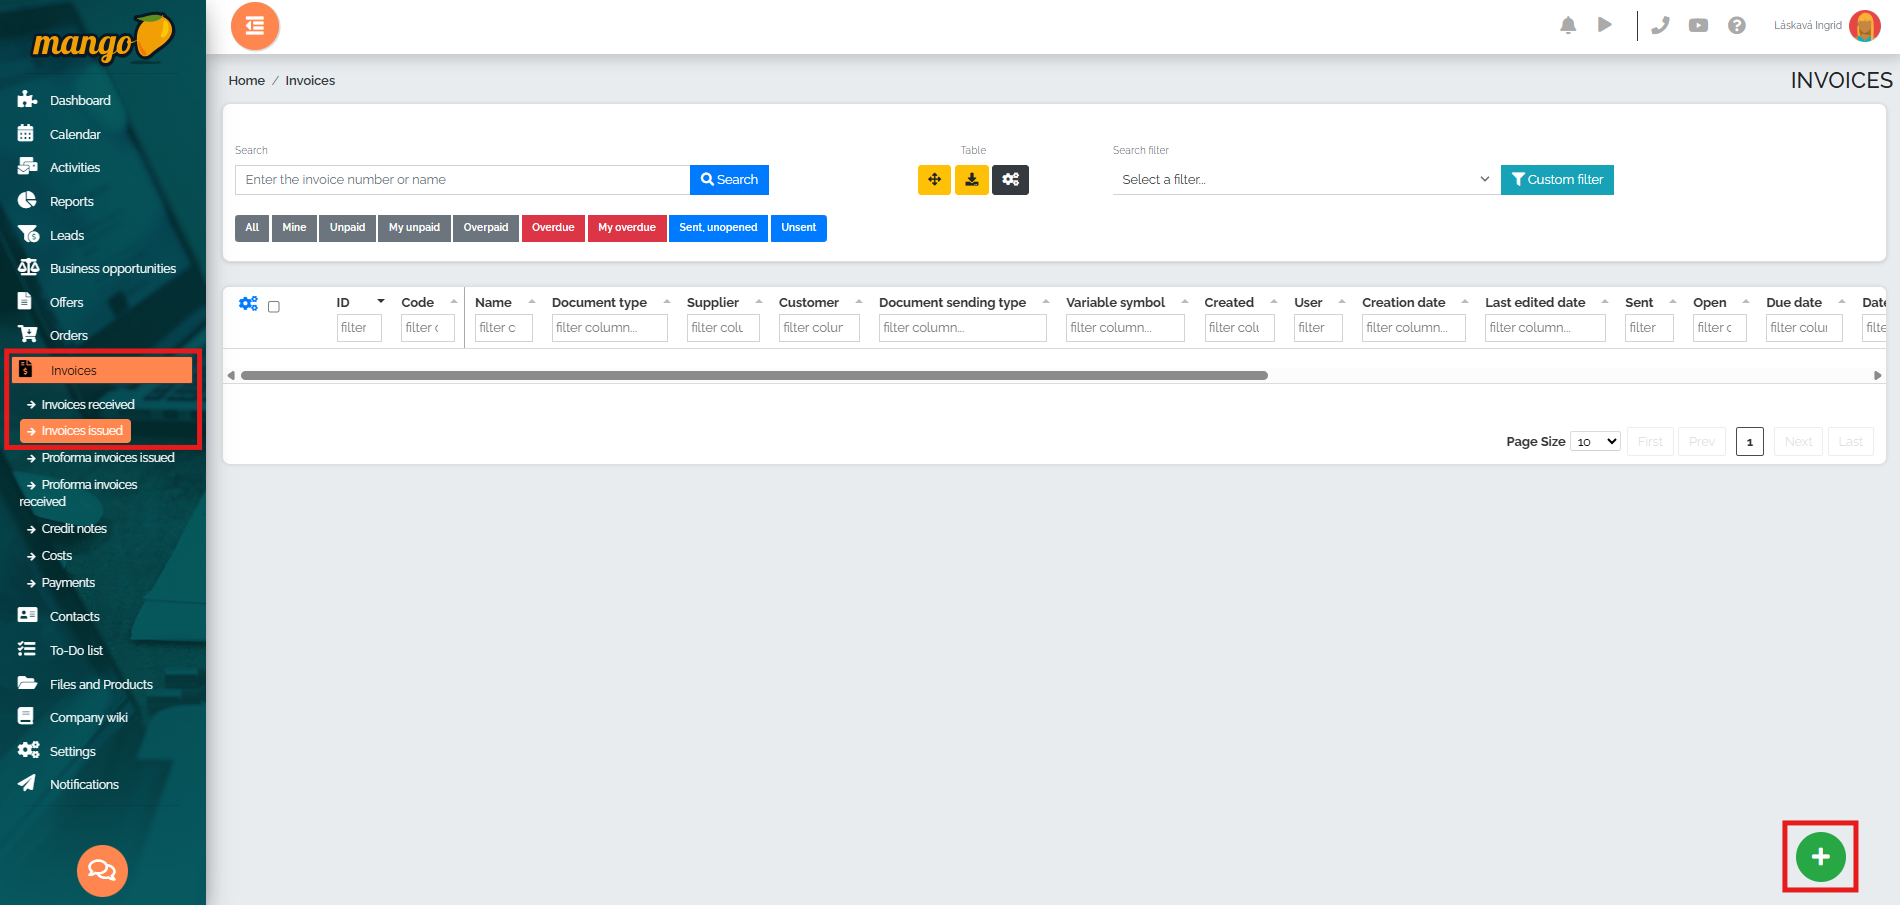
The first way to issue an invoice is manually. We move to the section Invoices - Invoices issued and in the lower right corner we press the green plus button :
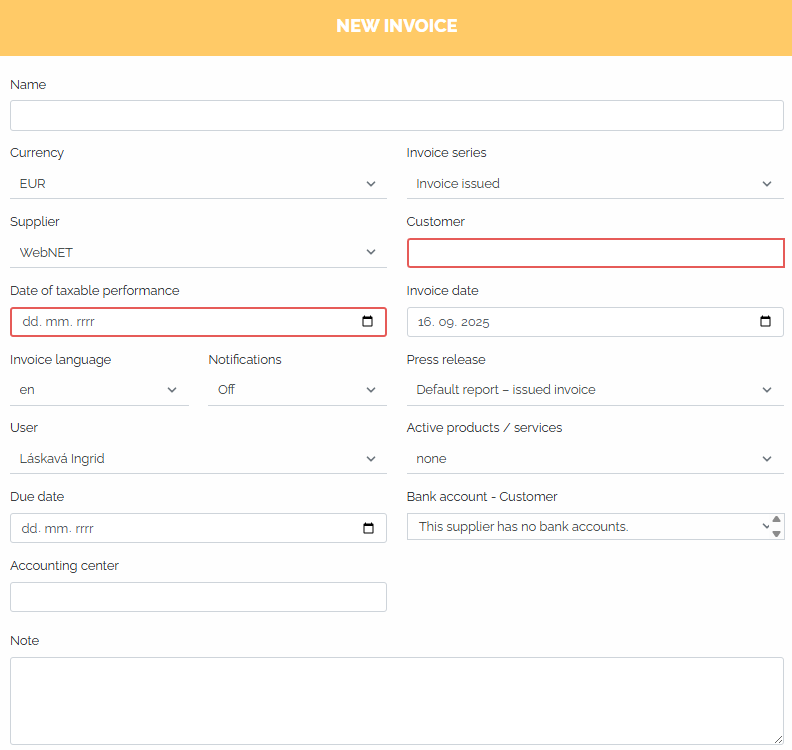
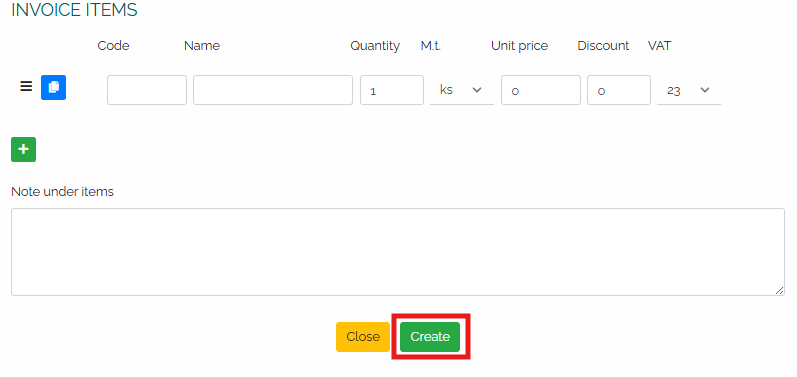
In the new window, it is necessary to fill in the fields such as the invoice name, or change the currency in which the invoice is issued, then fill in the supplier, customer, date of taxable supply, invoice language, notifications, or select the invoice printout (if we have several) and fill in the invoice items. We issue the invoice by clicking on the green Create button:

Note: The invoice due date (14 days) will be automatically filled in based on the invoice issue date. However, if a different due date than 14 days is specified in the company details in the Other tab, it will be automatically filled in the Invoice due date field.
After saving the invoice, we can see it in a table view in the list of issued invoices:

If we want to view or change the invoice before sending it, we click on the pencil icon (see image above) and the invoice details will be displayed. We can then make the necessary changes in the invoice details, or we can view the invoice for inspection by clicking on the Document Preview tab:
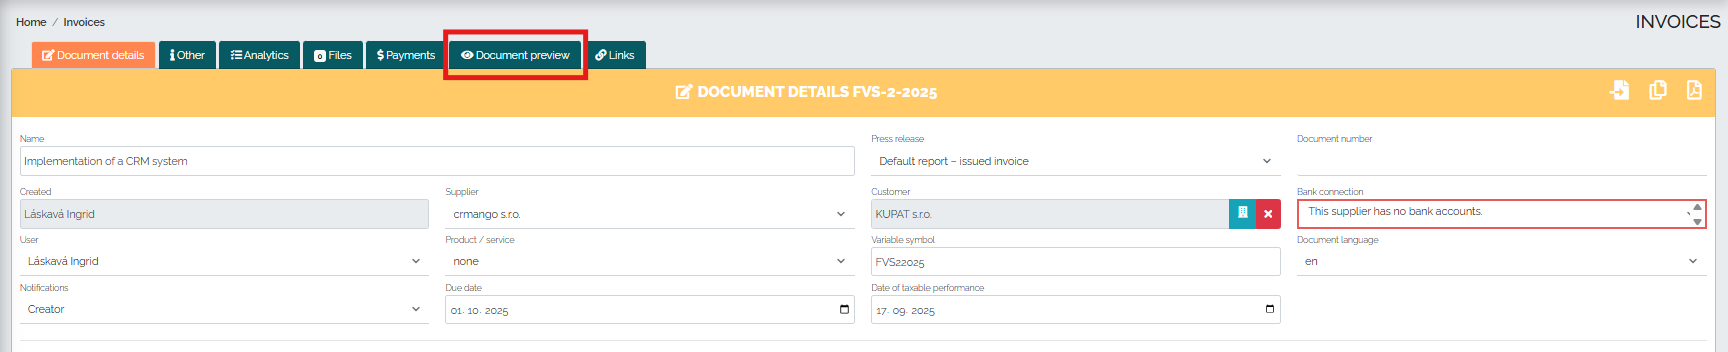
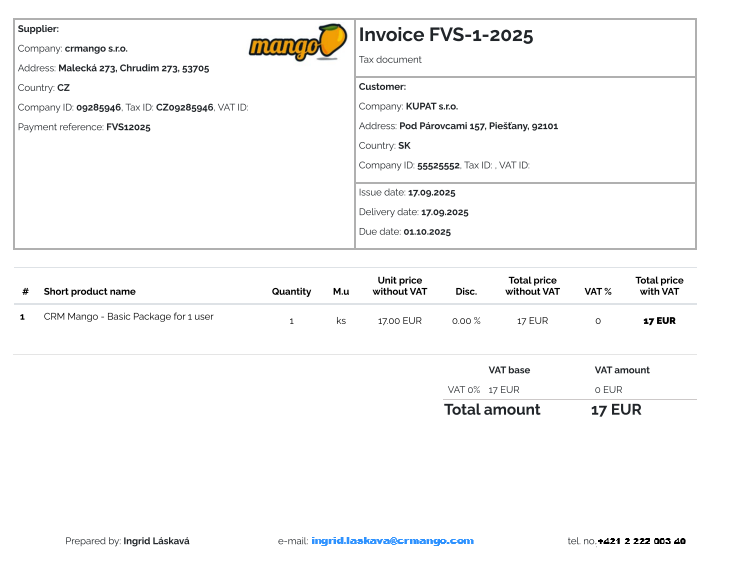
At this point, we will see a preview of the invoice issued:
2. Issuing an invoice from an order received
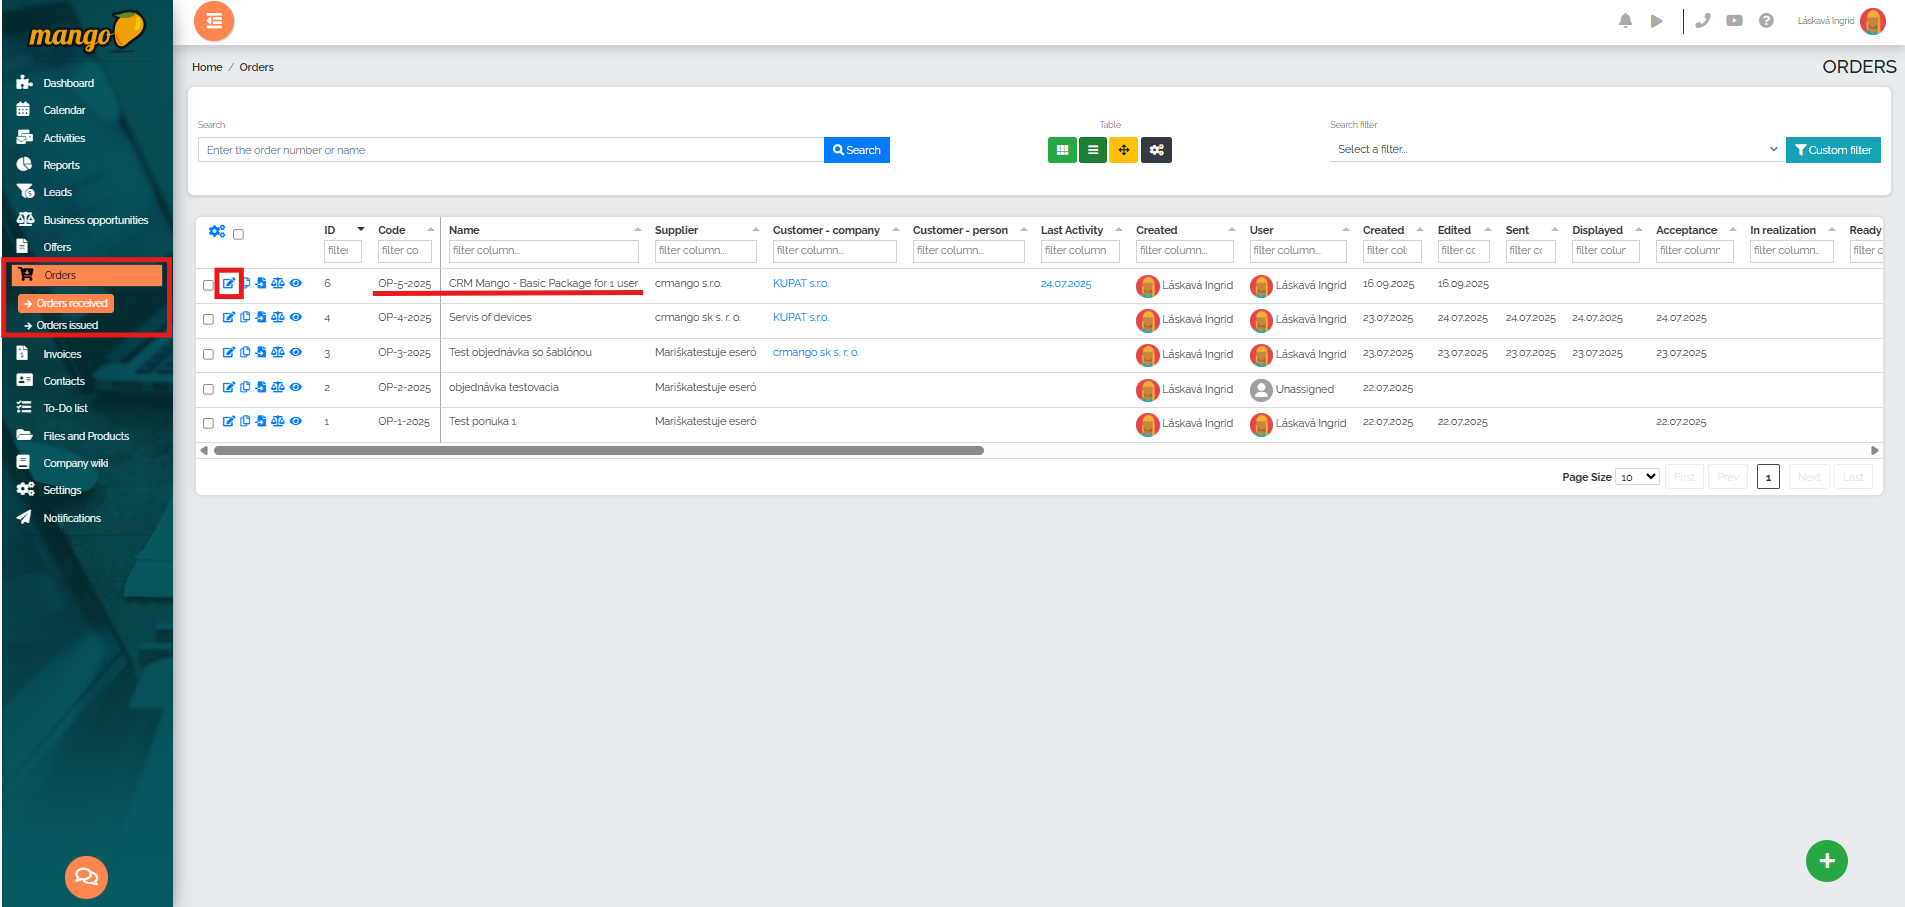
The second way to issue an invoice in the Mango system is to issue it directly from the order. This is the most efficient way to issue an invoice, especially if the company processes orders directly in Mango. So, we go to the Orders - Received orders section - and find a specific order in the order list and click on the pencil icon :
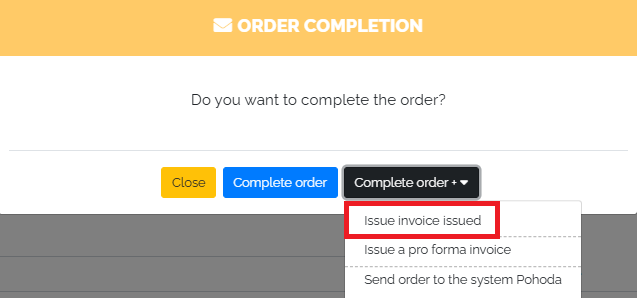
The order details will then open and when we have checked all the data, we click on the last point of the so-called order timeline - Order completion :

The system will then offer us several options - but we will choose the option Complete order + Issue invoice issued :
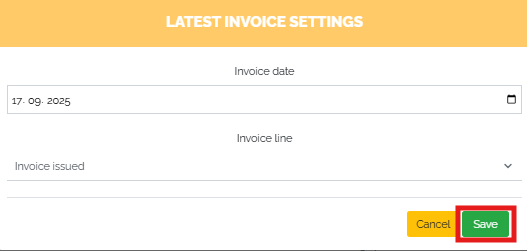
In the next step, we have the option to change, for example, the invoice issue date and save the invoice by clicking the Save button:
After saving, we can see in the order details, in the Links tab, that an invoice is linked to the given order - its number, customer, invoiced amount will be displayed, and it is also possible to edit this invoice directly by clicking on the blue pencil icon : 
Also in the Orders - Orders Received section, the invoice number associated with the order is displayed in the column titled Invoice Issued. Clicking on this number will open the invoice itself, which can be edited if necessary.

We can also proceed in a similar way when issuing advance invoices.